
User groups
Creating a User Group
To create a user group:
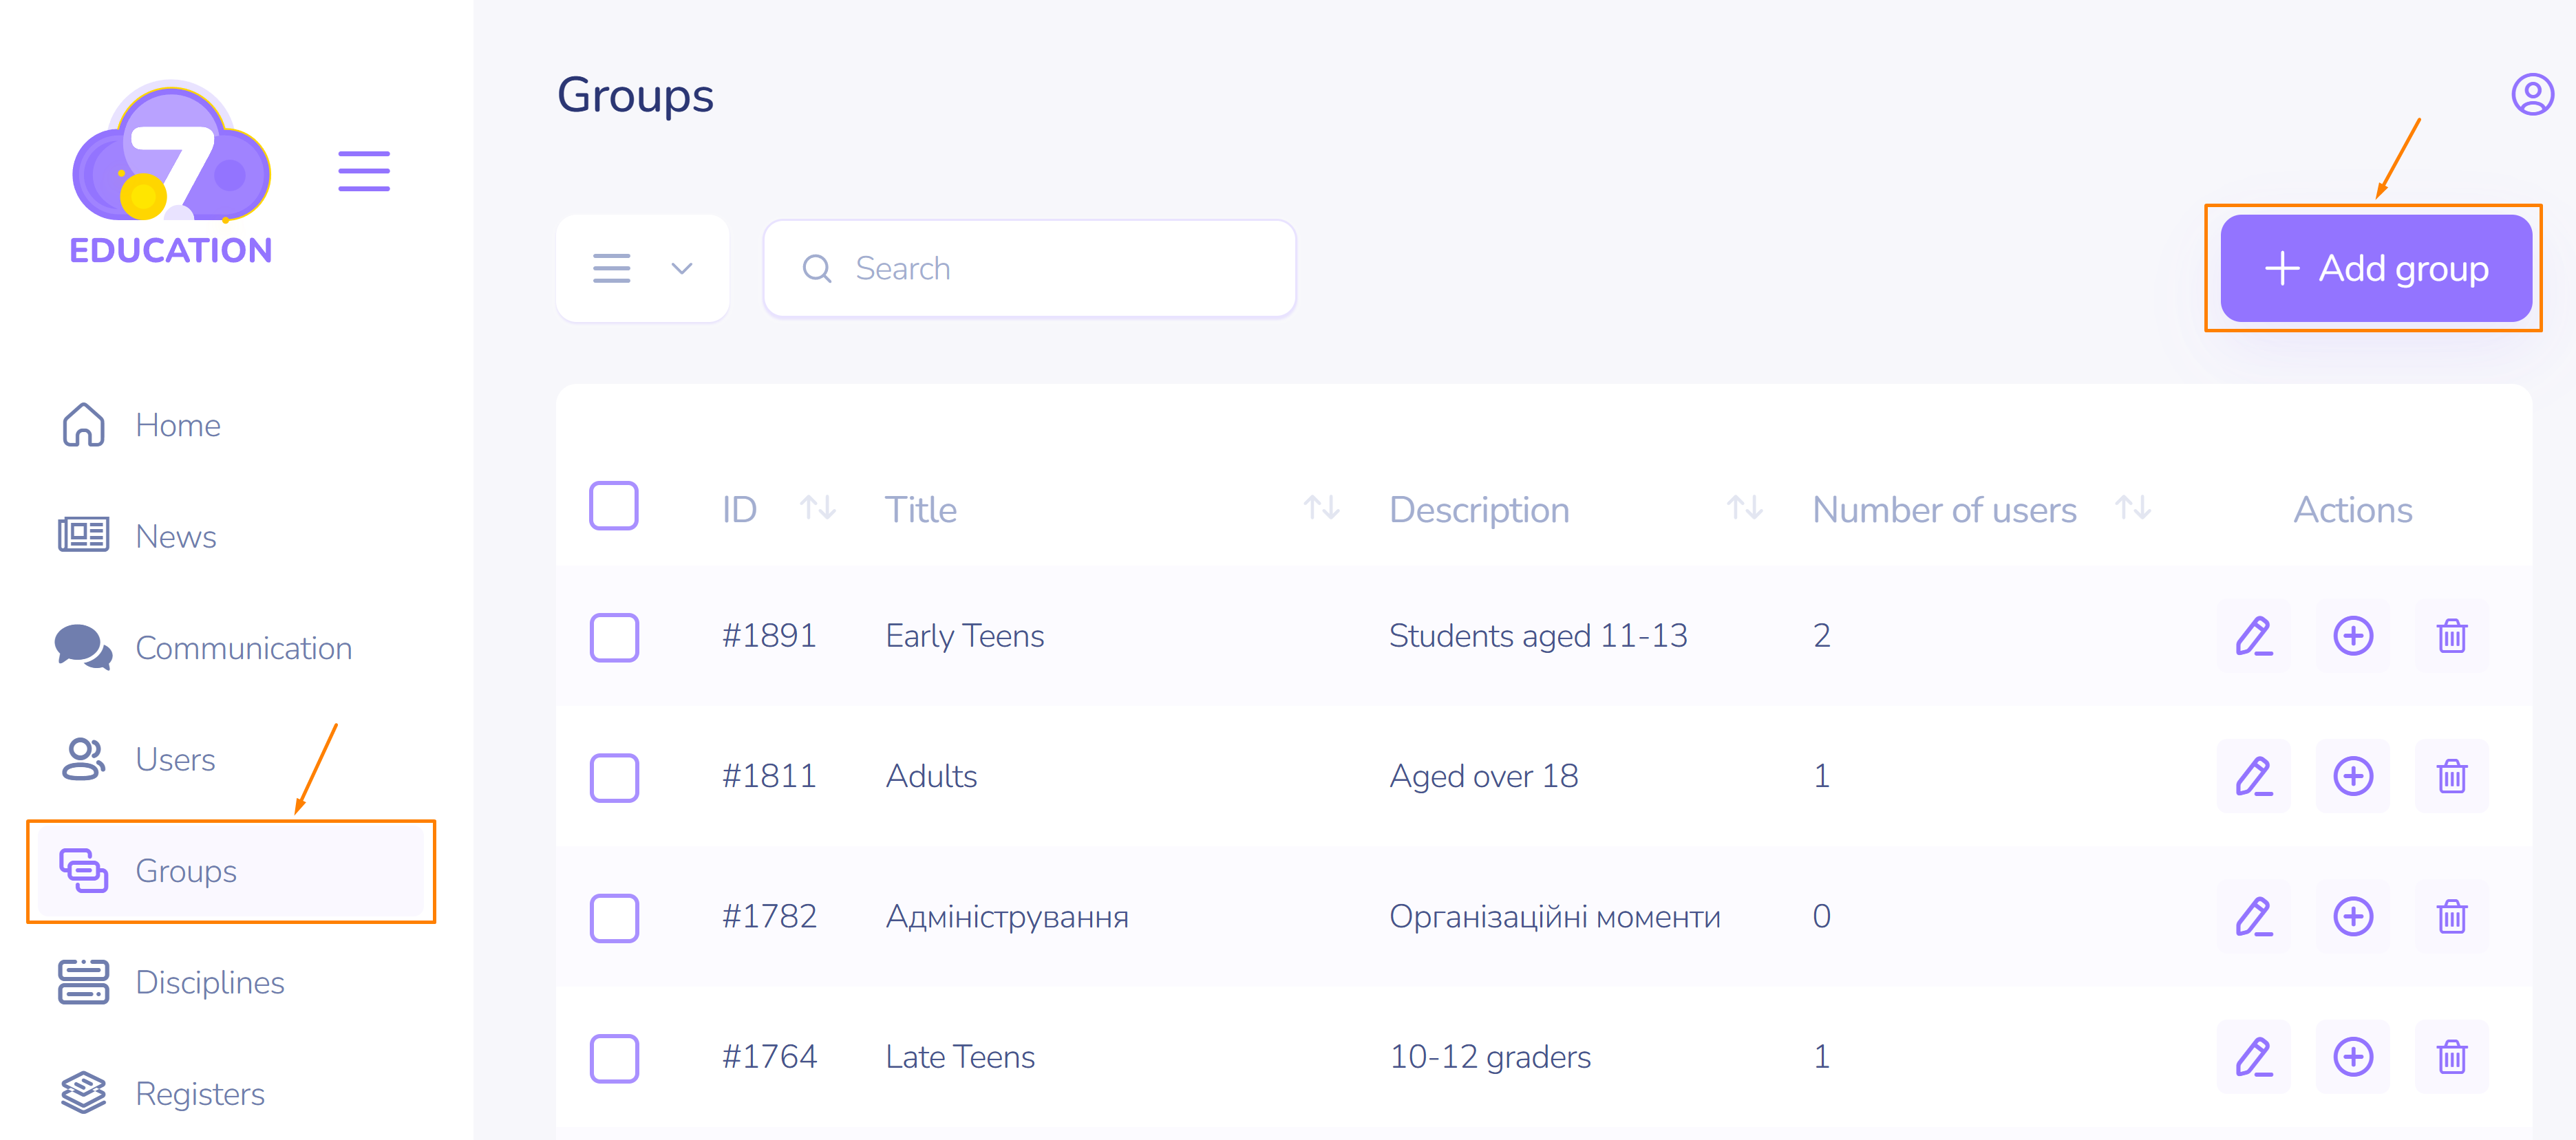
- On the left sidebar, click Groups.
- In the top right corner, click Add Group.
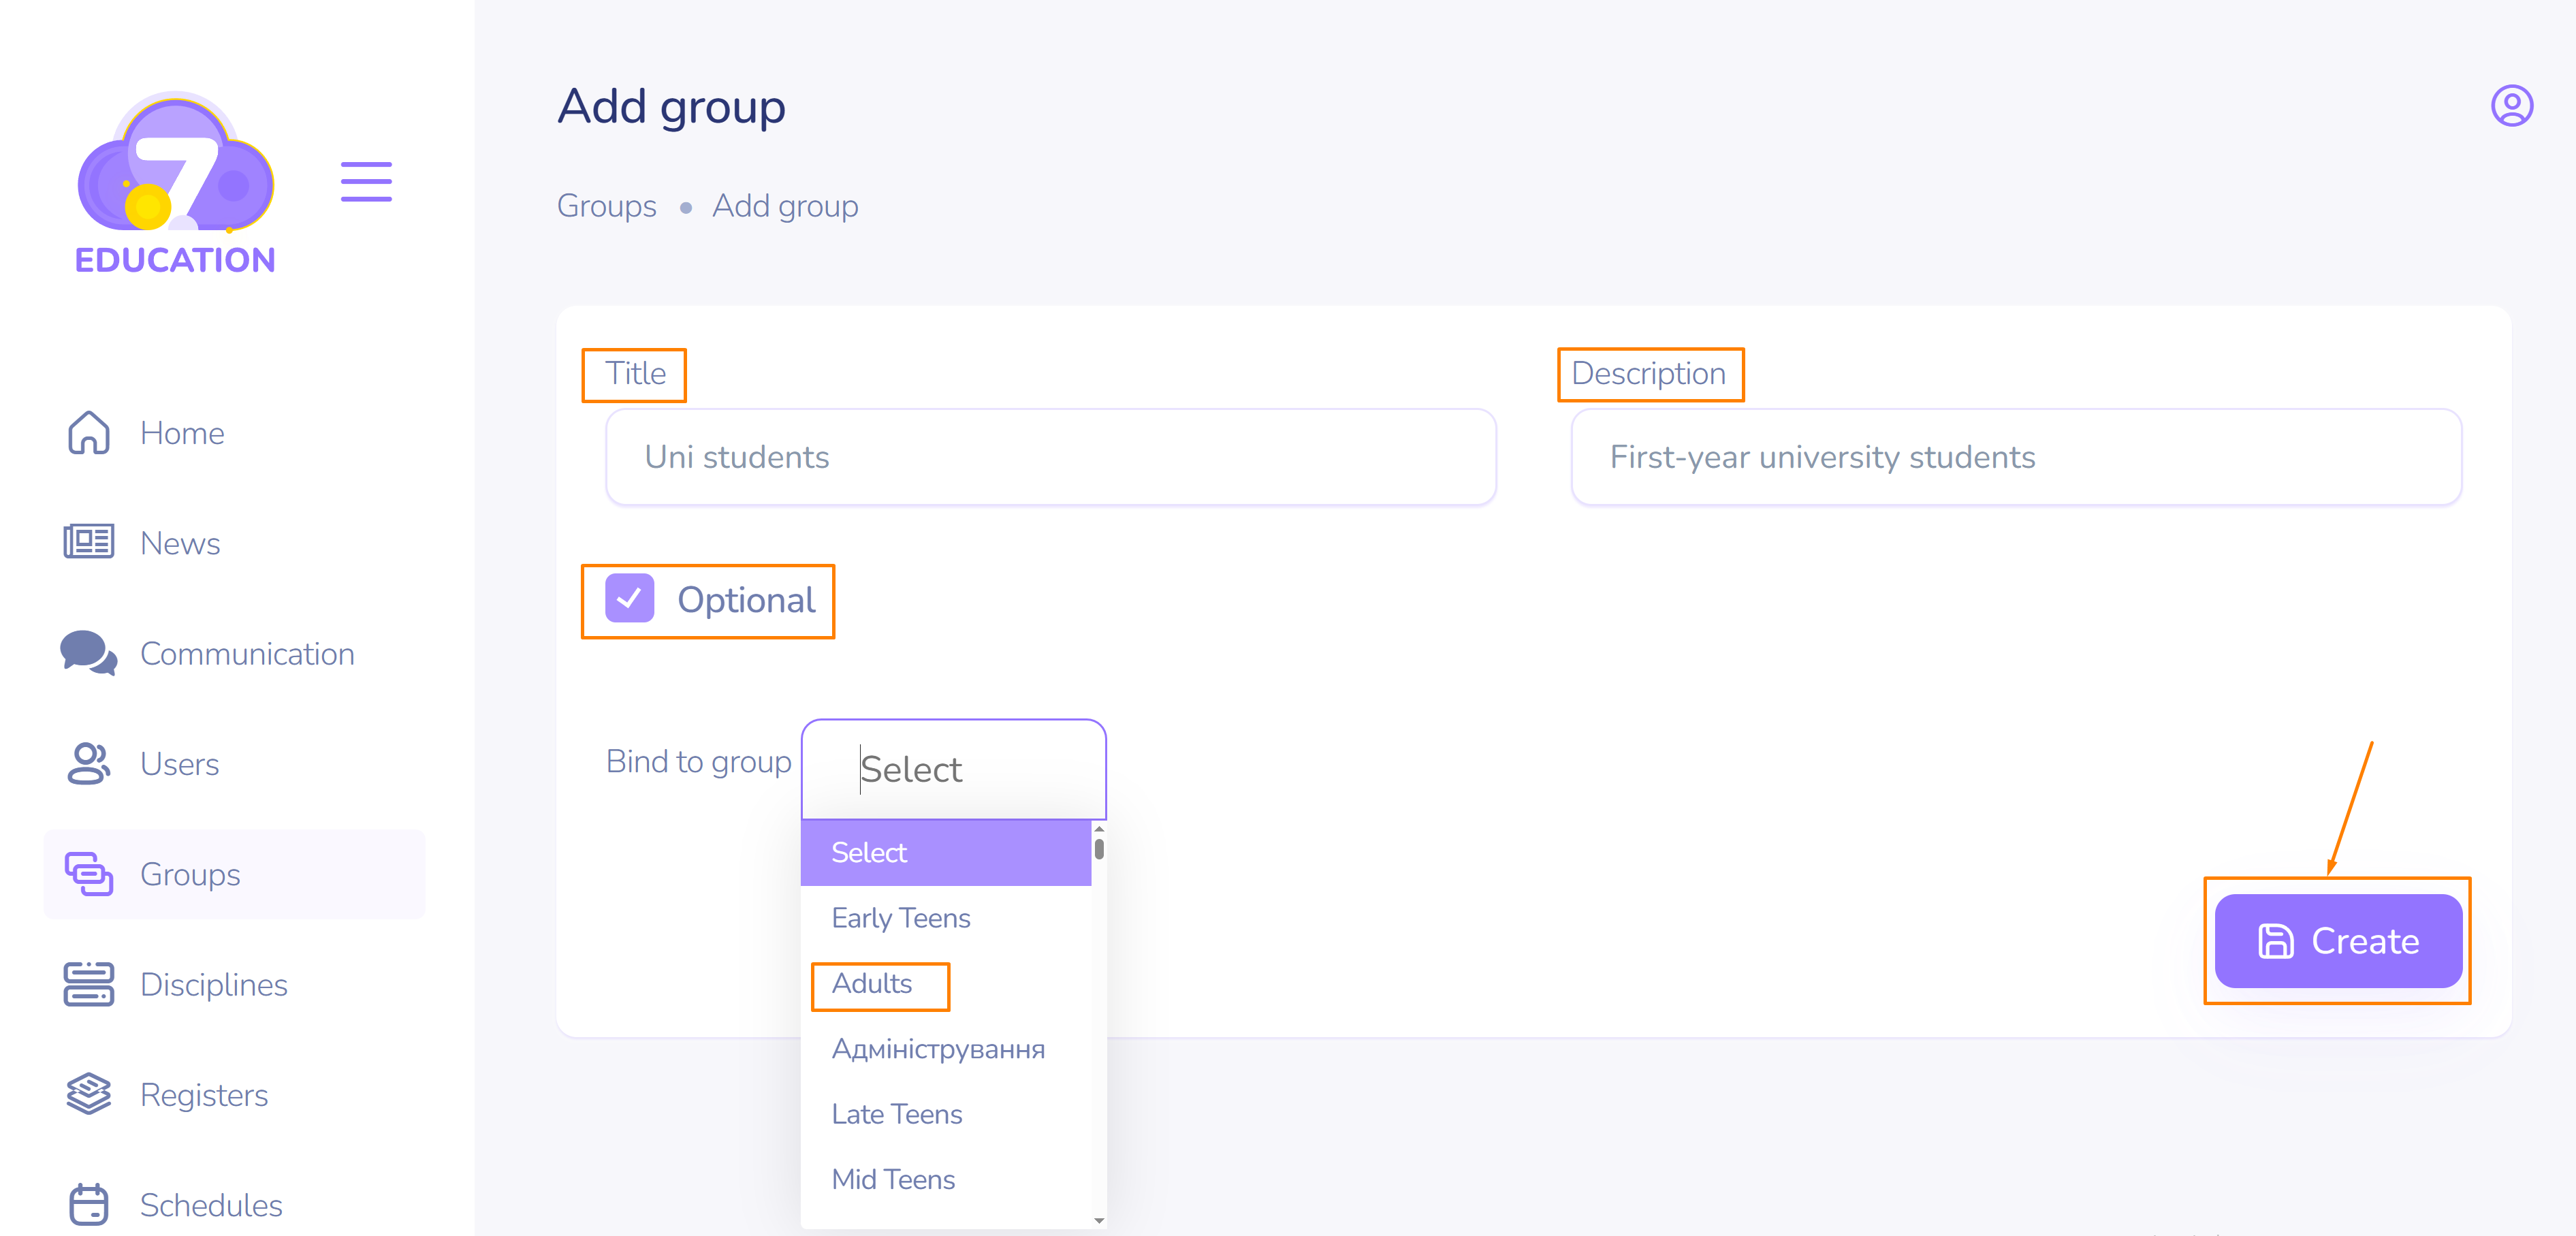
- Add a name, description, and mark the group as optional if necessary. In this case, you must bind the group to any compulsory groups.
- Click Create.
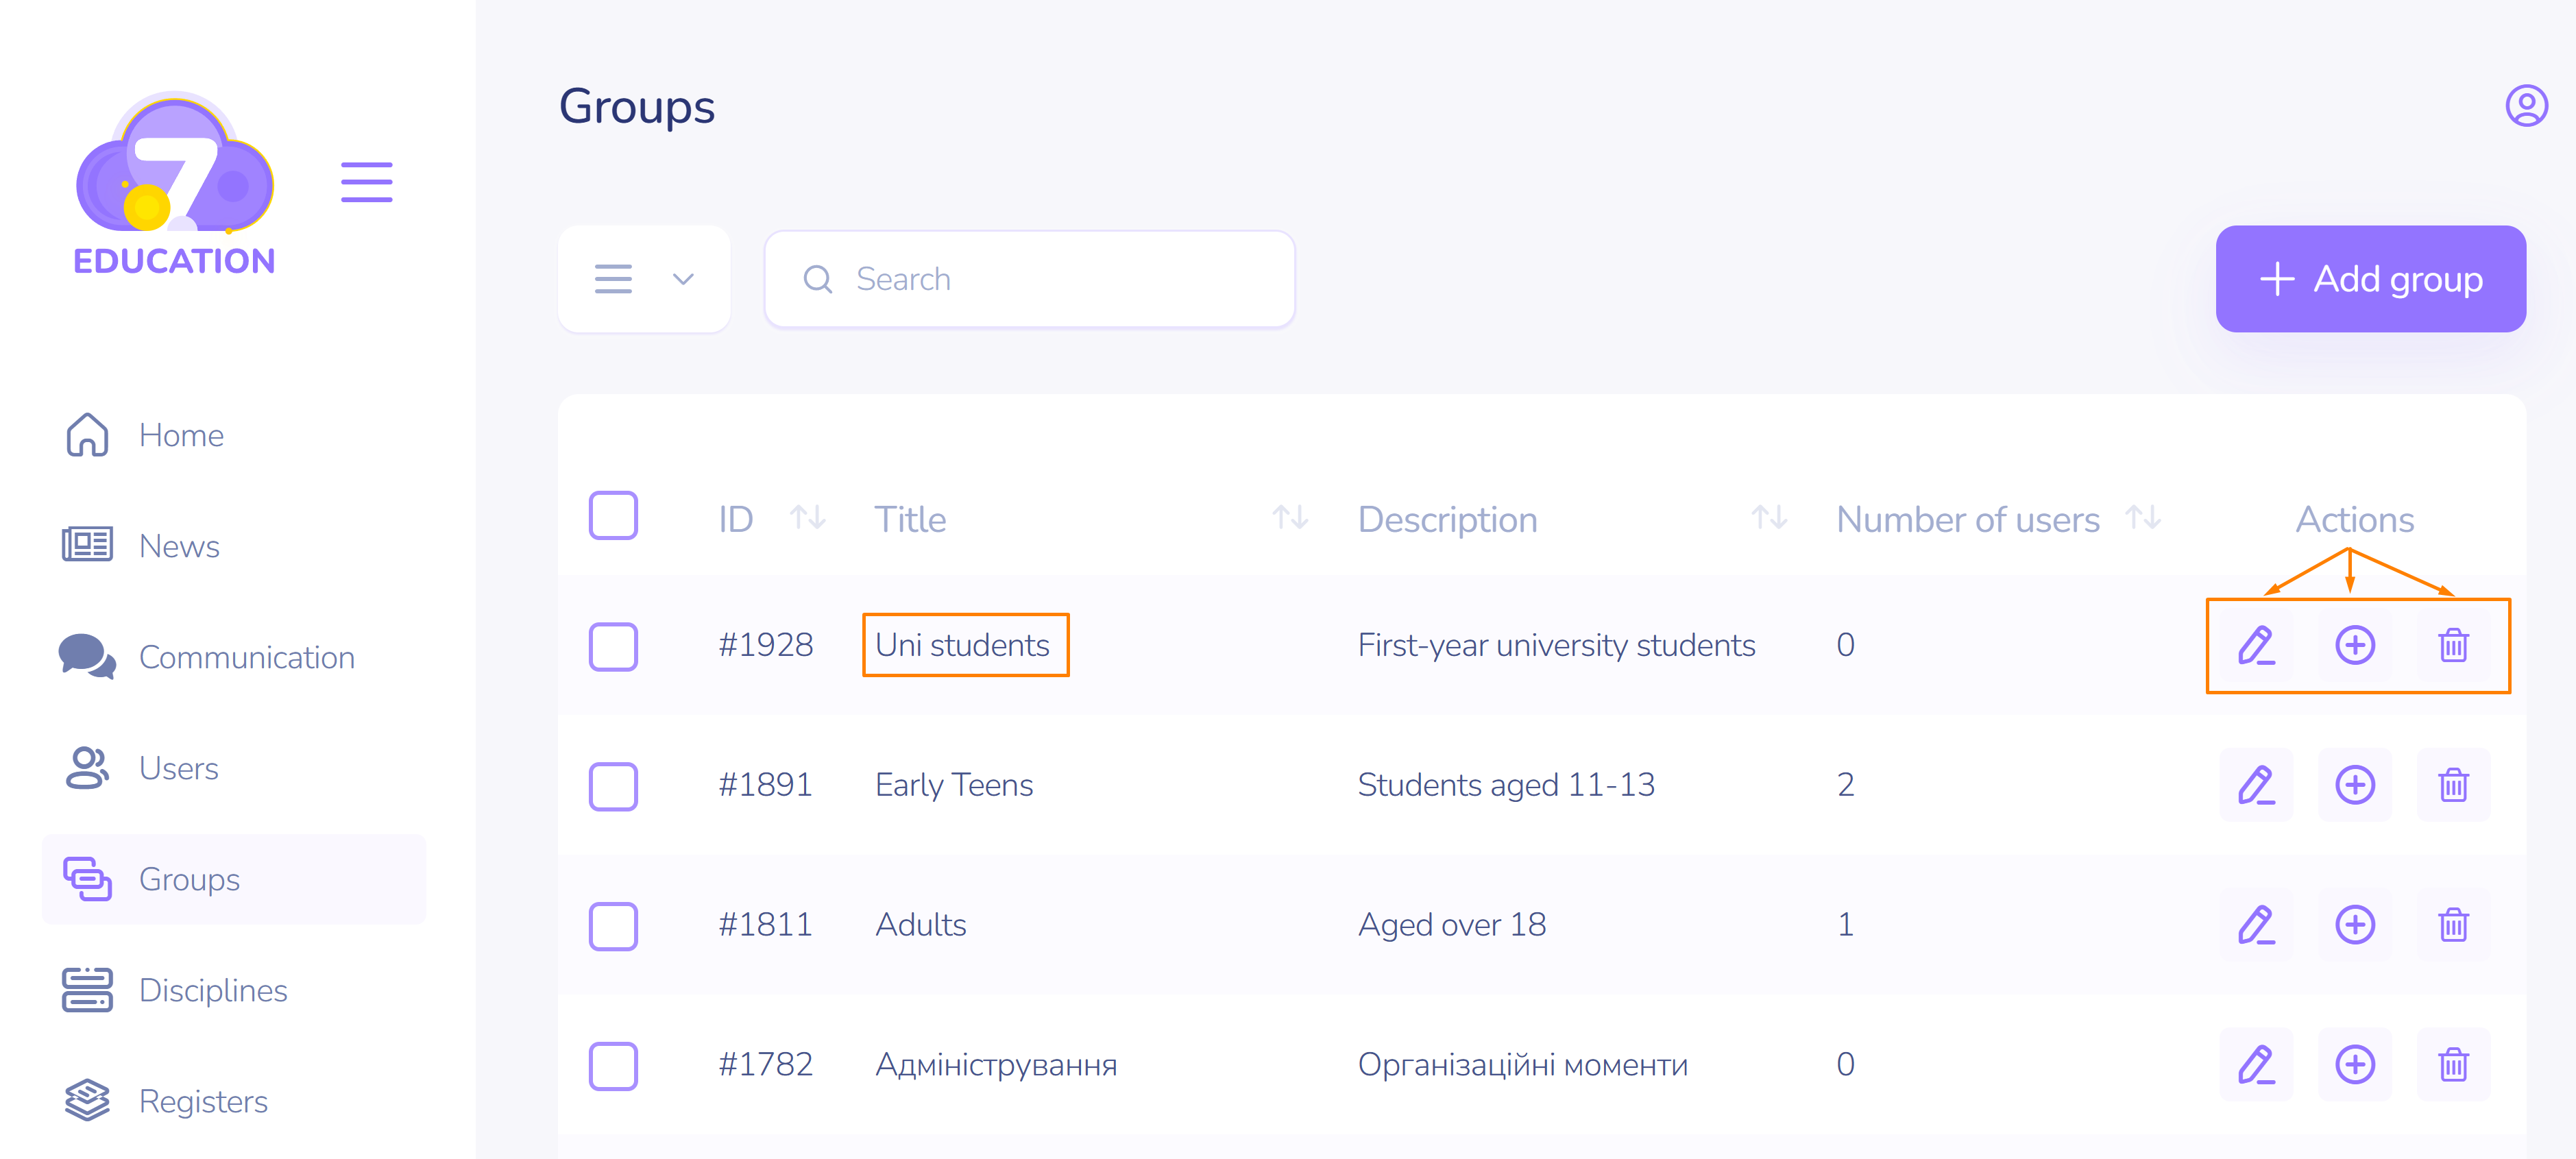
The newly created group will appear in the top row of the list. You can now edit it, add users to it, or delete it.
Enrolling/Excluding Users
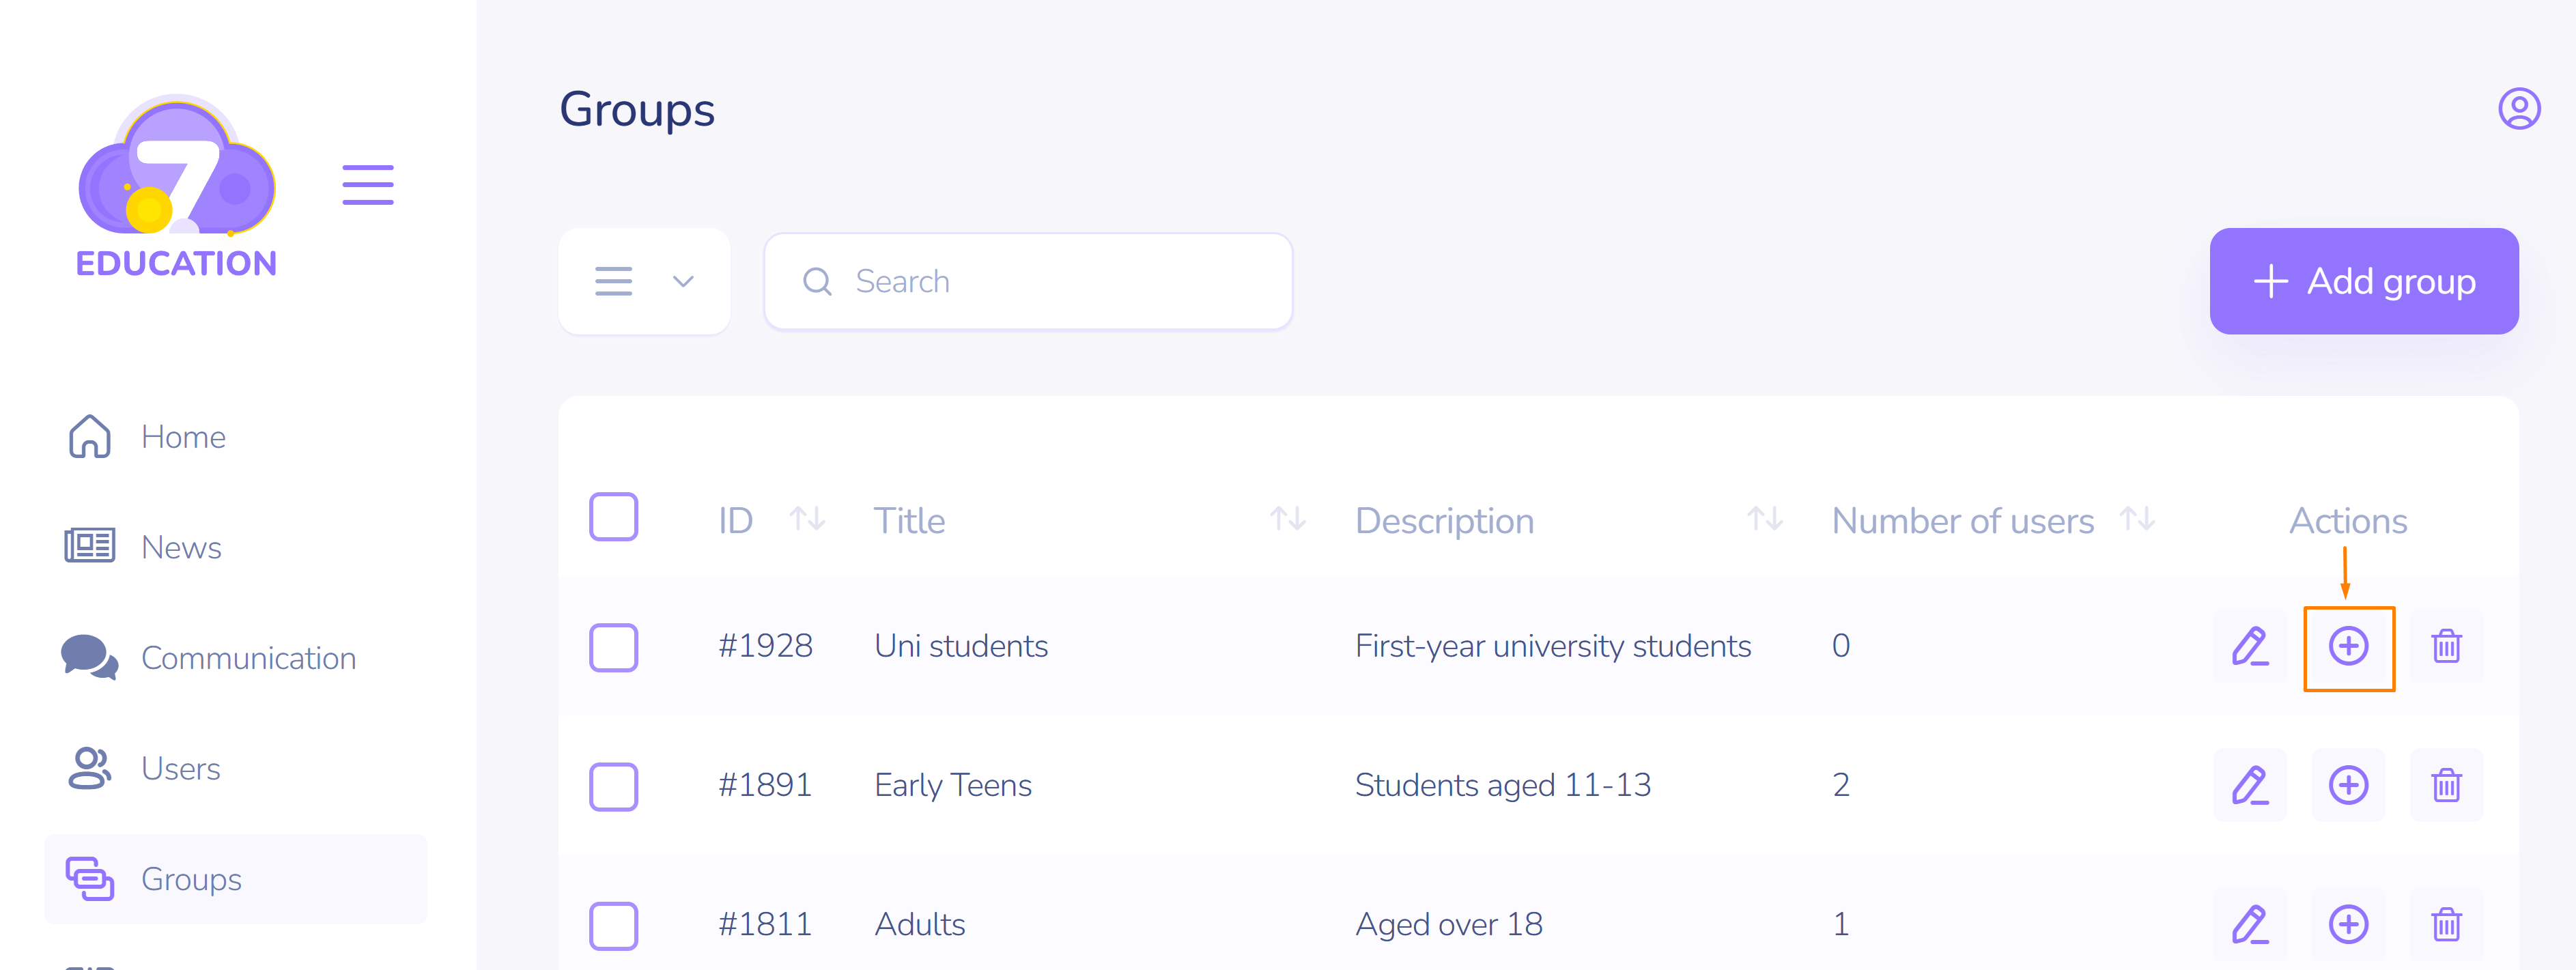
On the right side of the row with the group name, click the corresponding icon to add users to the group.
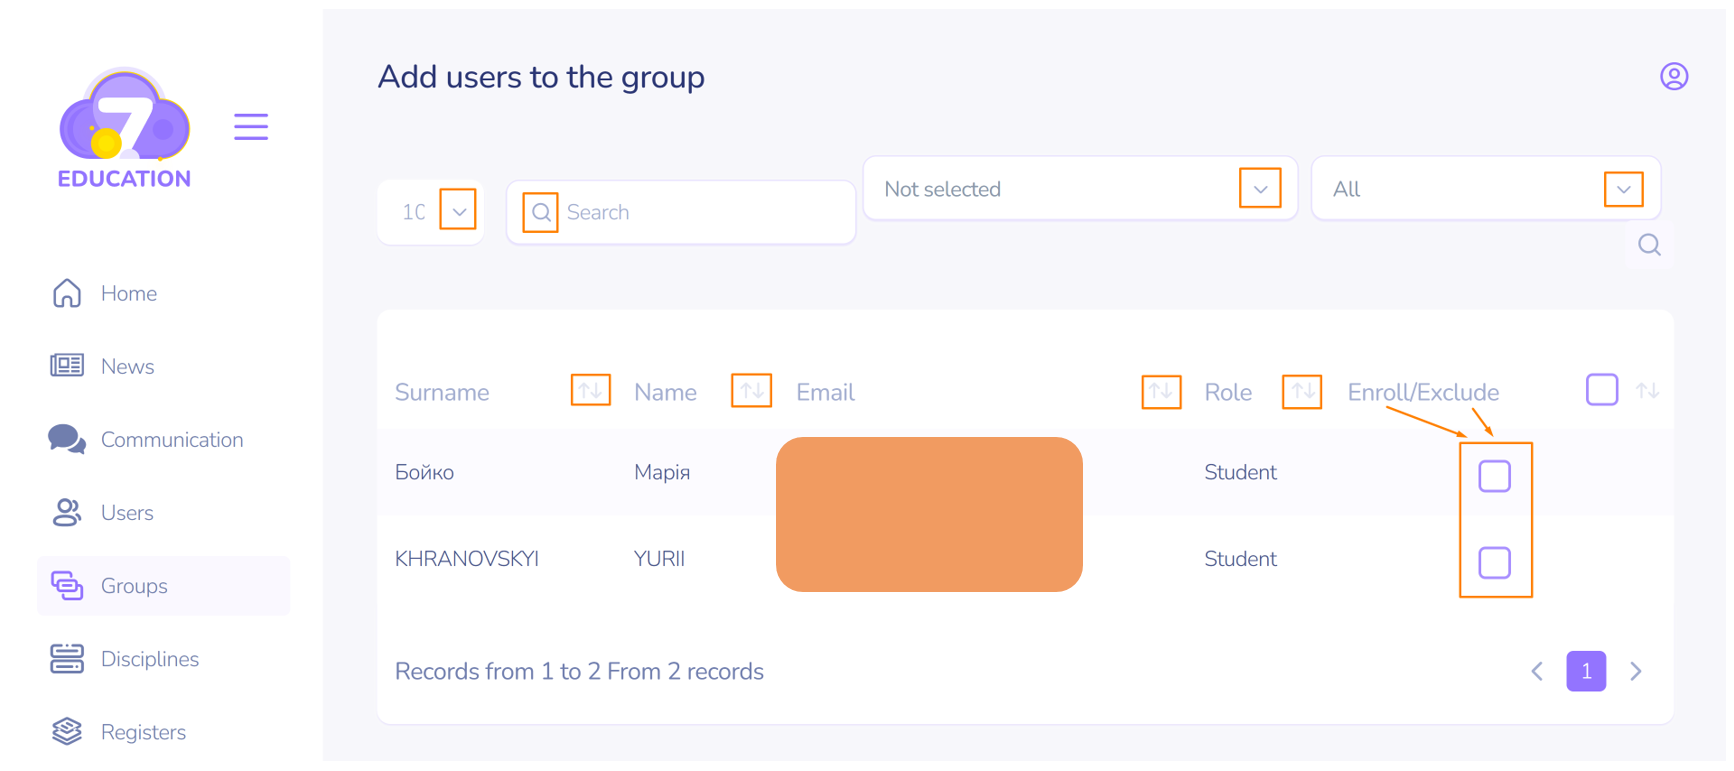
In the new window, from left to right:
- Set the number of users to be displayed on the screen.
- Search for a user by name or email address.
- Enroll users from an existing group (the list is available under the 'Not selected' category).
- Enroll all users from the system.
- Sort users alphabetically using the buttons with double arrows.
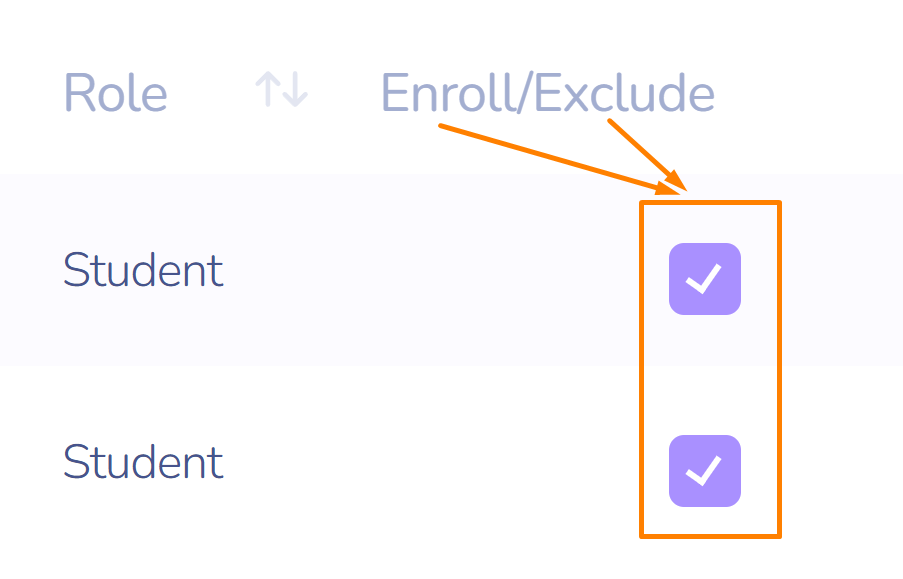
- Enable the toggle next to the user's name to add them to the group.
- Disable the toggle to remove them from the group.
Important! You can enroll both entire existing groups and individual users to the newly created group.
Enrolling a Group to a Discipline
To enroll groups to one or more disciplines:
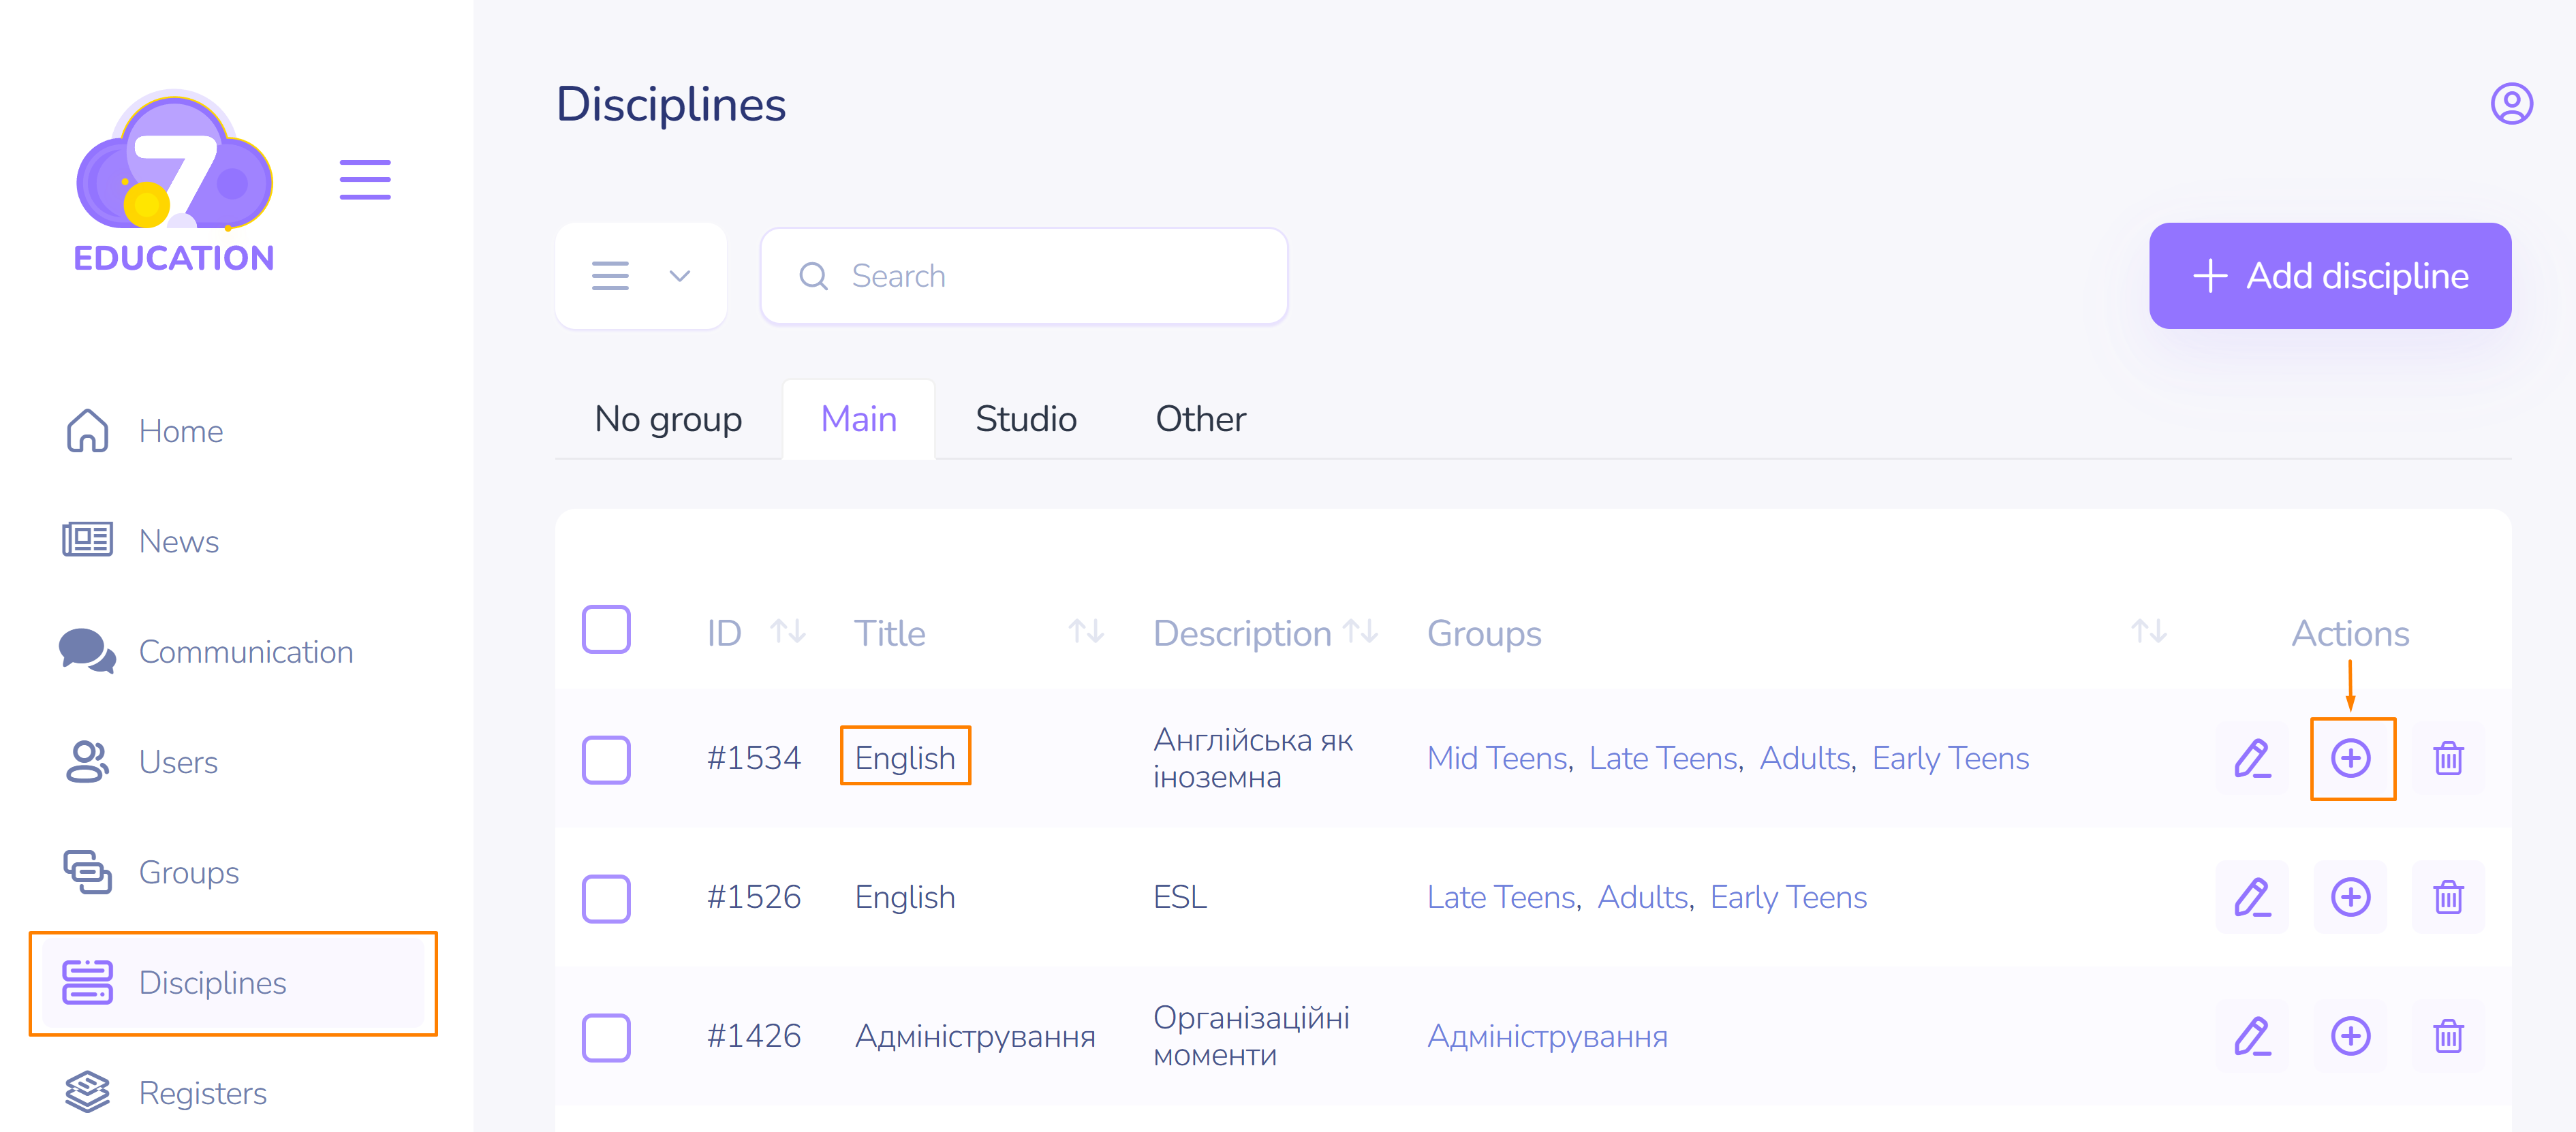
- On the left sidebar, select Disciplines.
- In the row with the name of the discipline for which you need to add a group, click Add on the right.
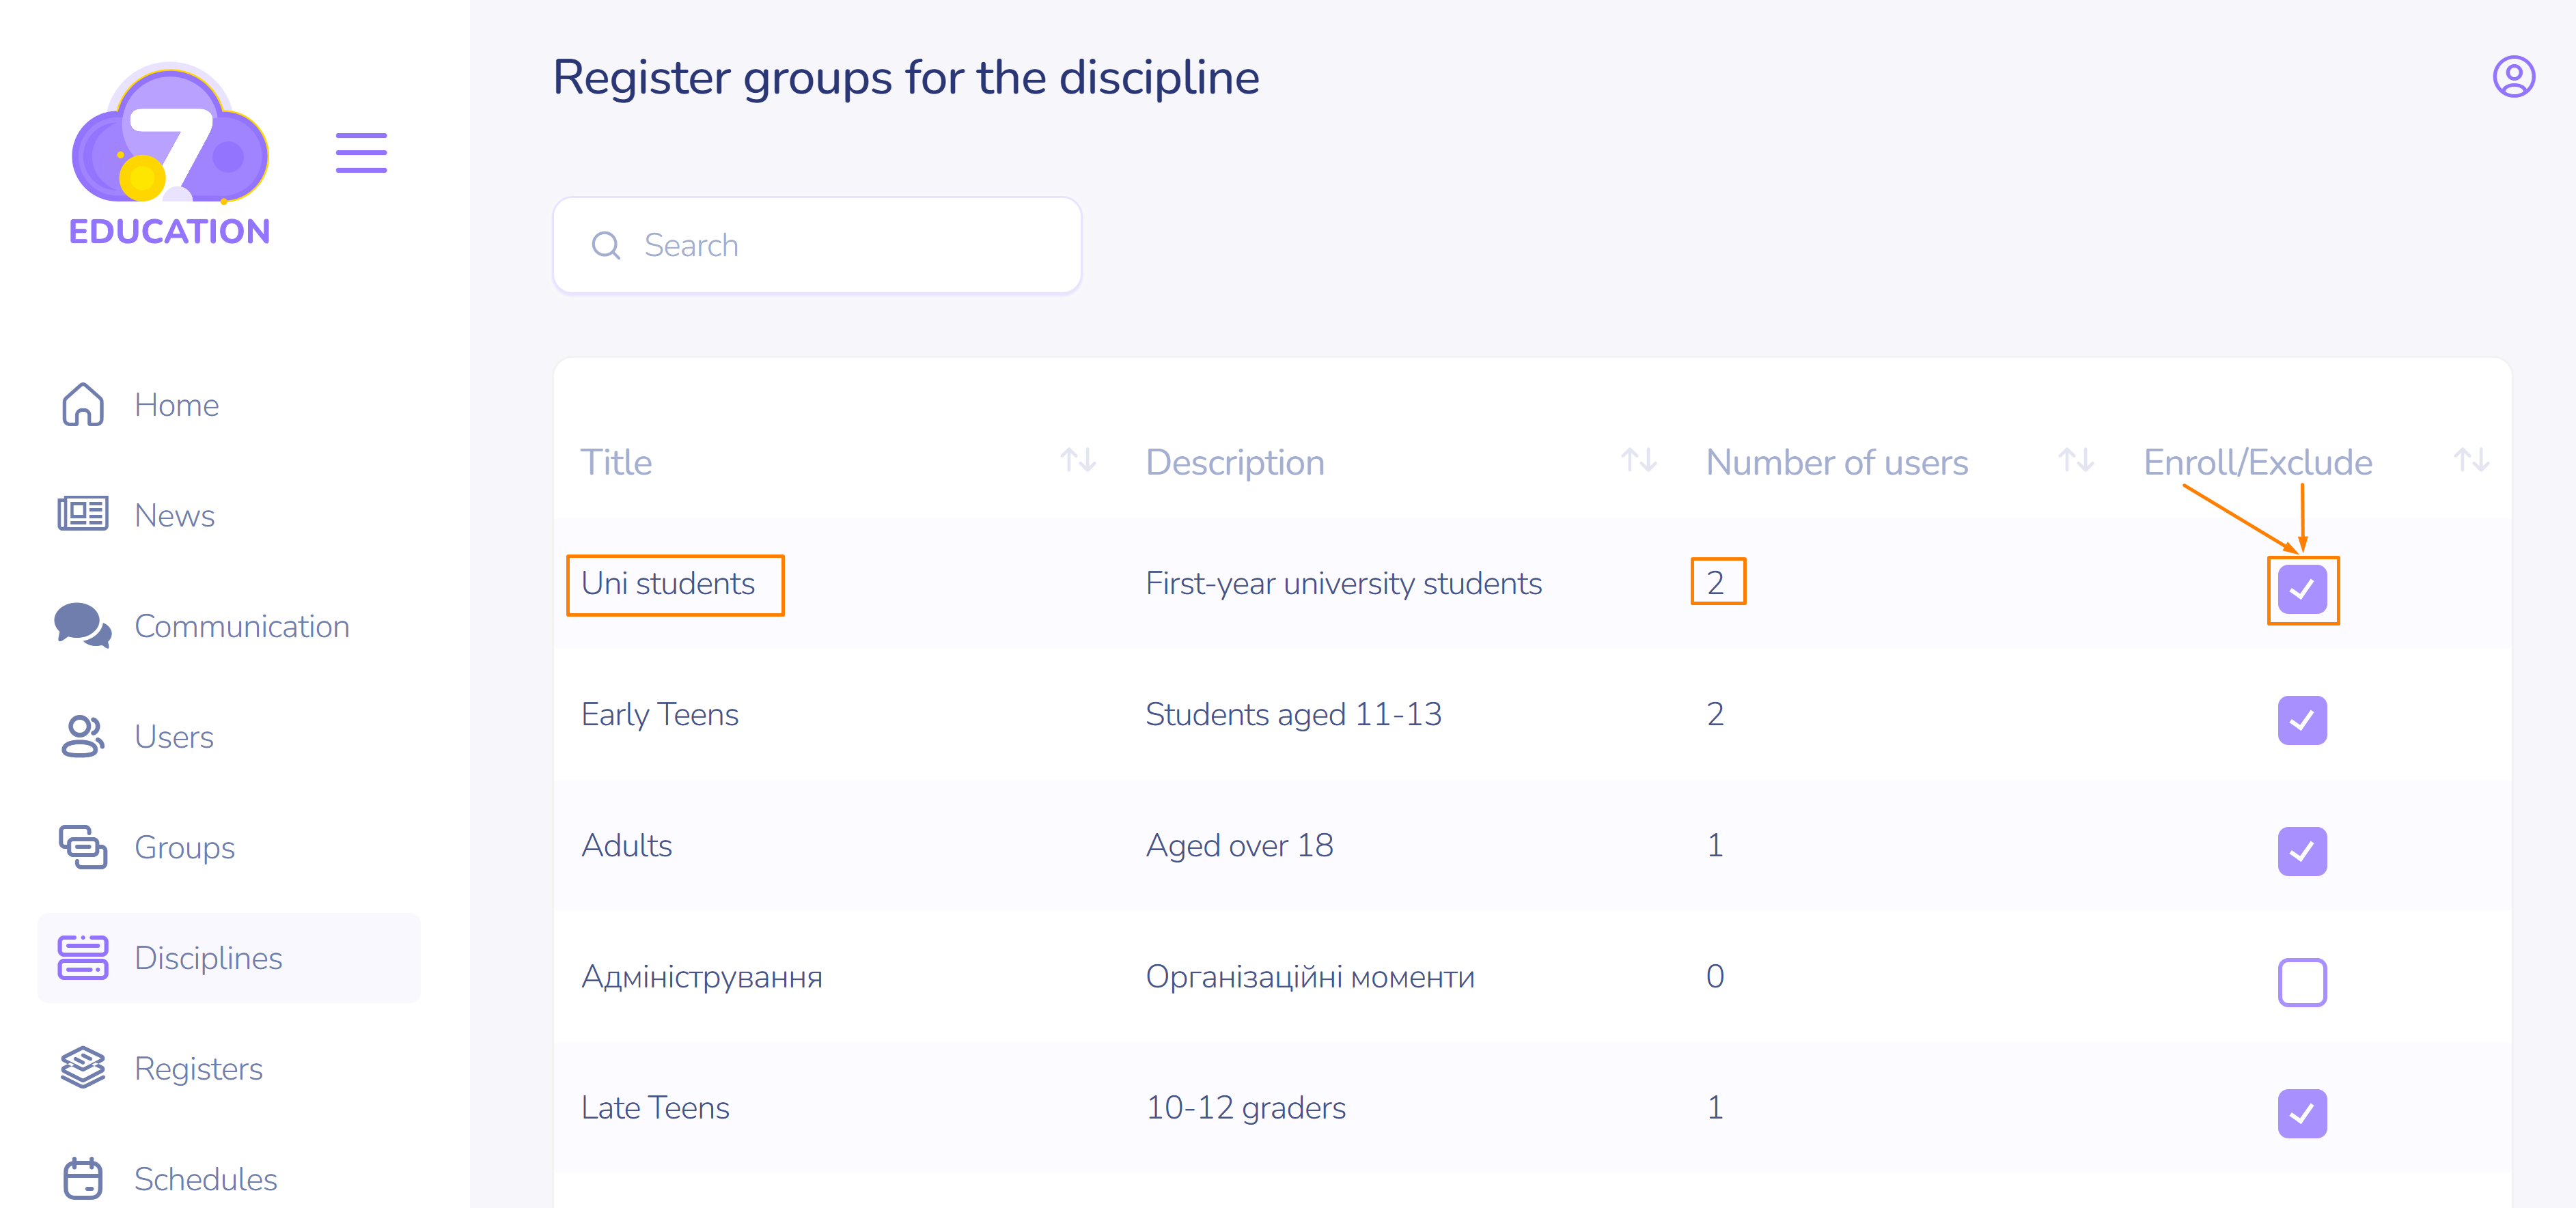
3. In the window that appears, select the group(s) and enable the toggle to enroll or disable it to exclude users from the group.
Important! You cannot add individual users to a discipline without first adding them to a group. You can only enroll/exclude entire groups. Even if there is only one user in a group, this enables enrolling/excluding them from the discipline.