
Schedules of lessons
User Roles and Available Functionality
Users with different roles see the schedule differently:
- Only a user with the administrator role can create/edit a schedule.
- A user with the role of teacher or tutor can view schedules for specific subjects/groups.
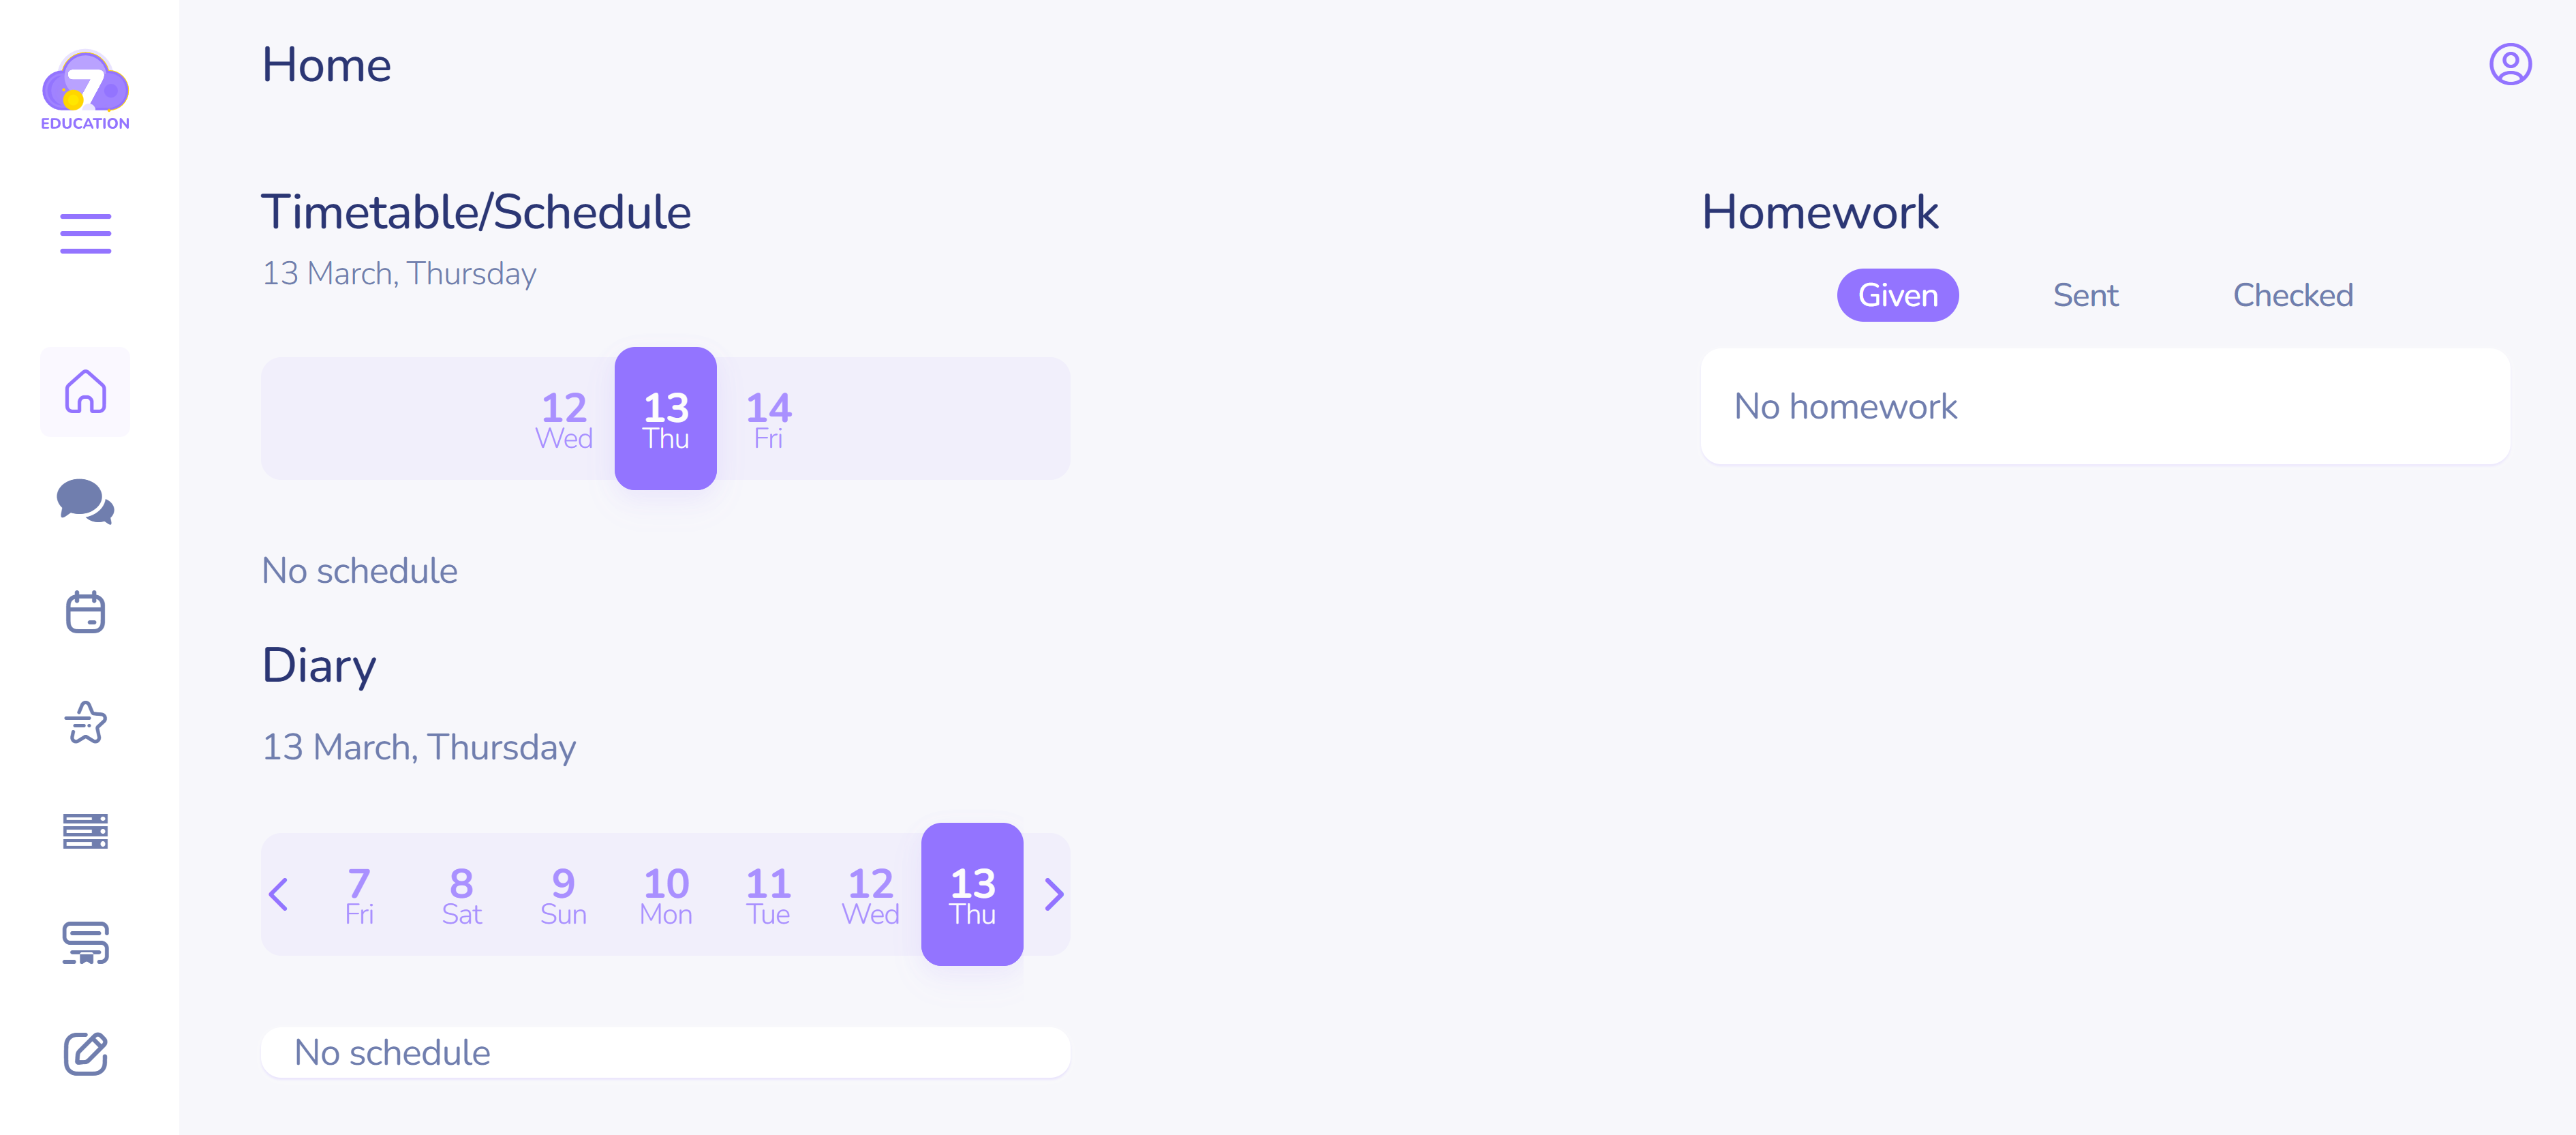
- A user with the role of student/auditor/parent can view the consolidated timetable for the week.
How to create a schedule
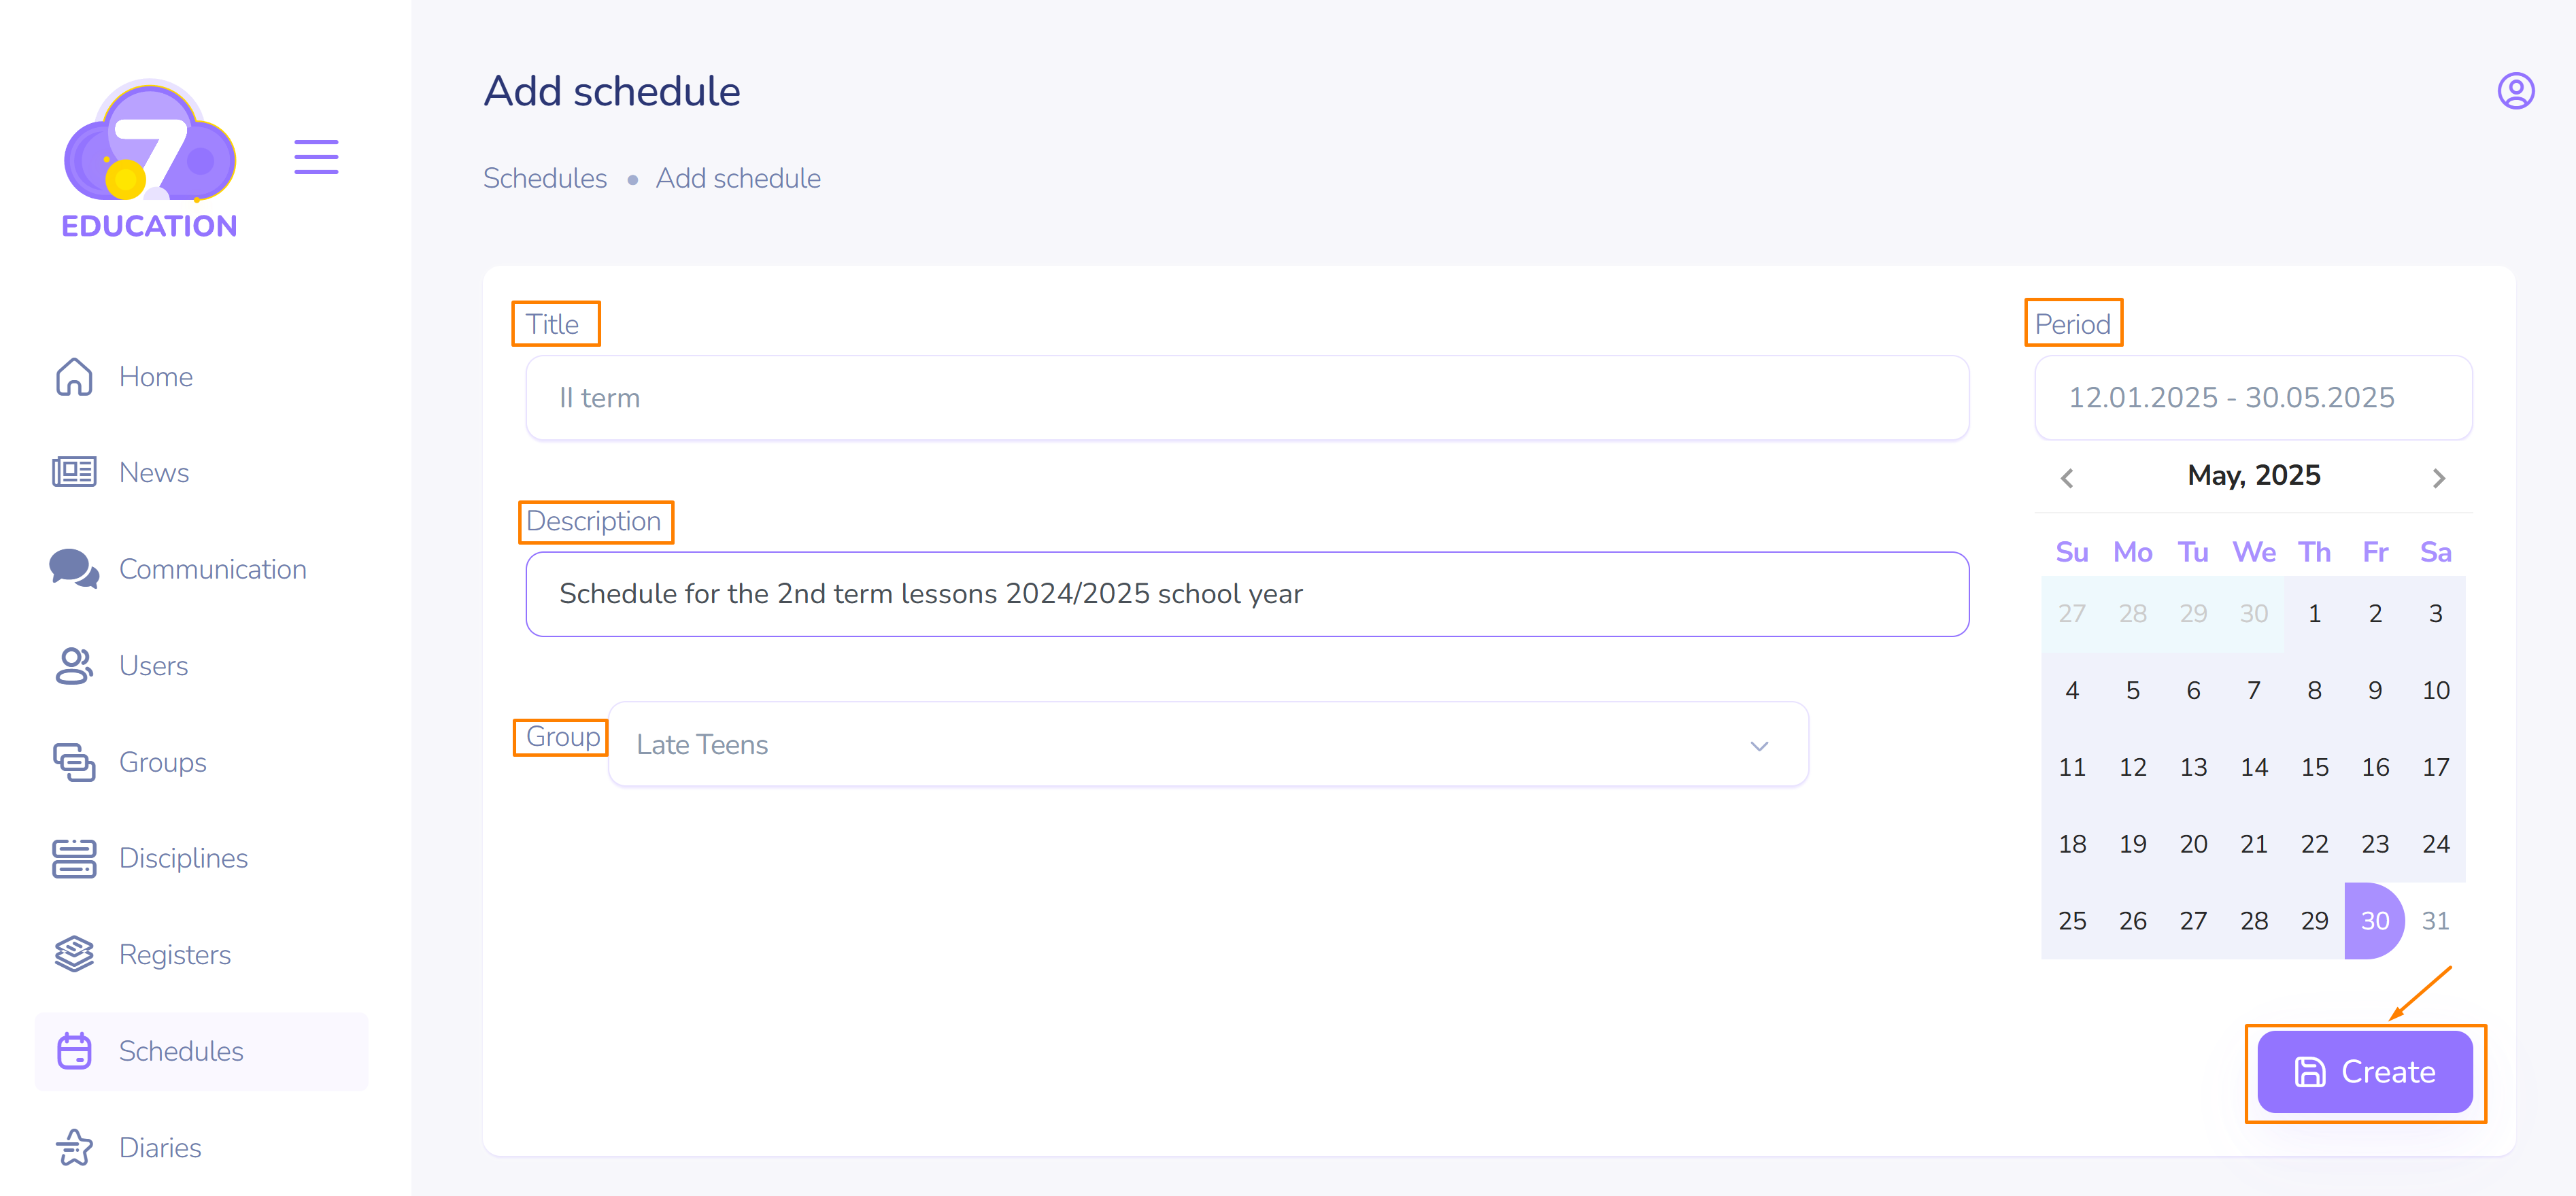
To create a schedule in the administrator space:
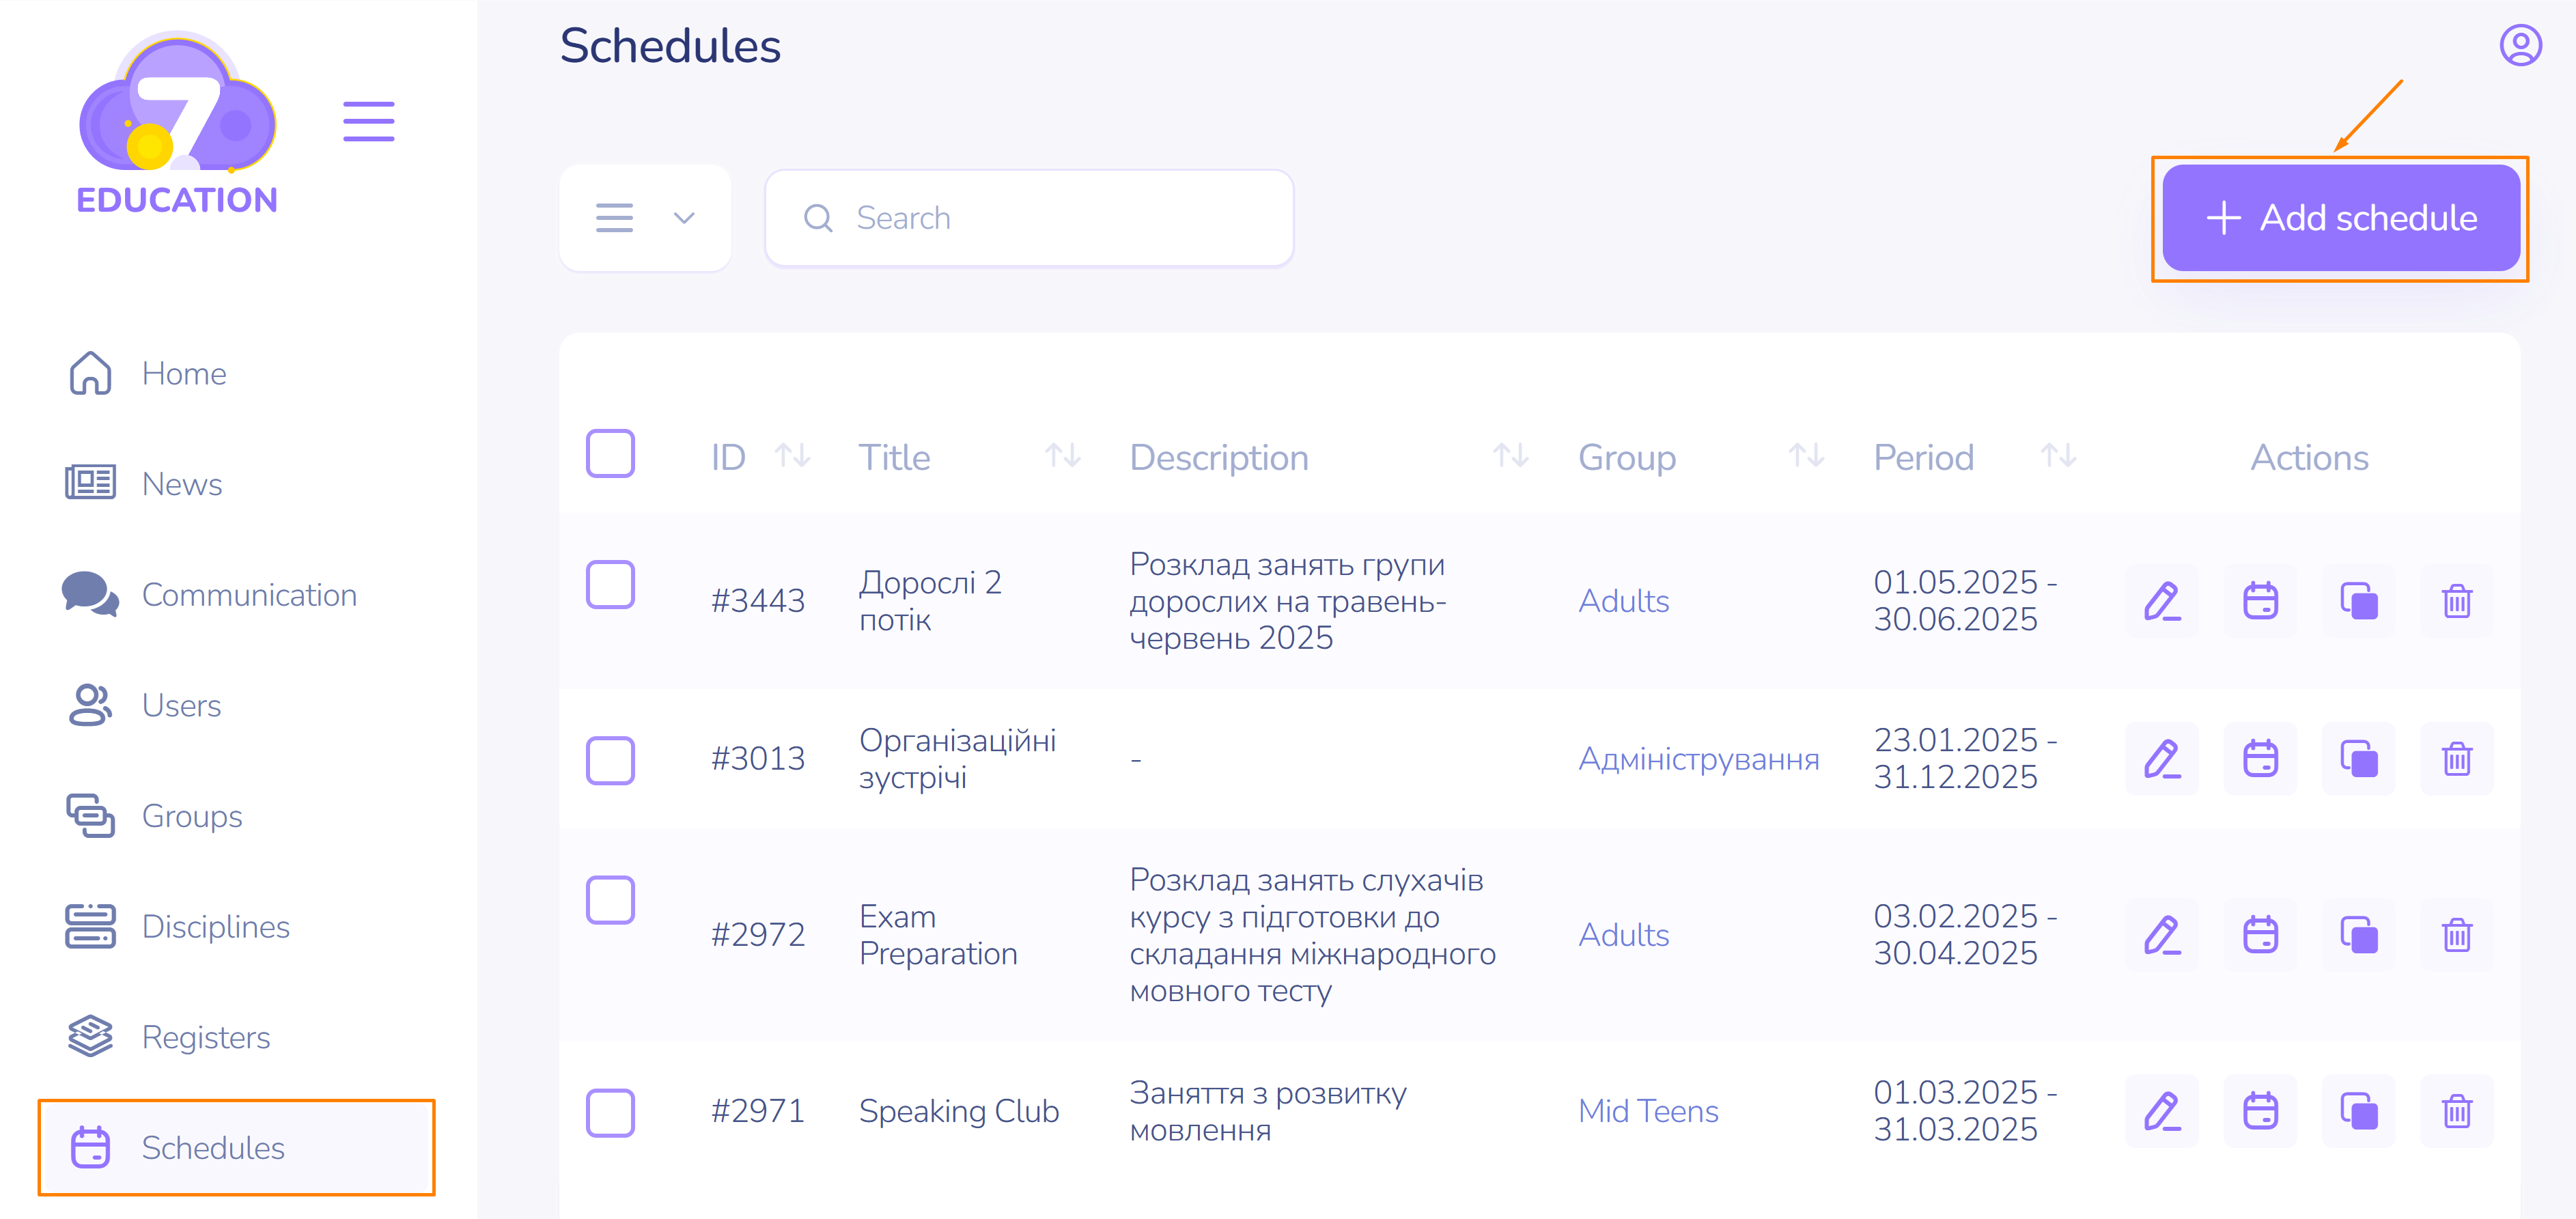
- On the left sidebar, select Schedules, and then click Add Schedule at the top right.
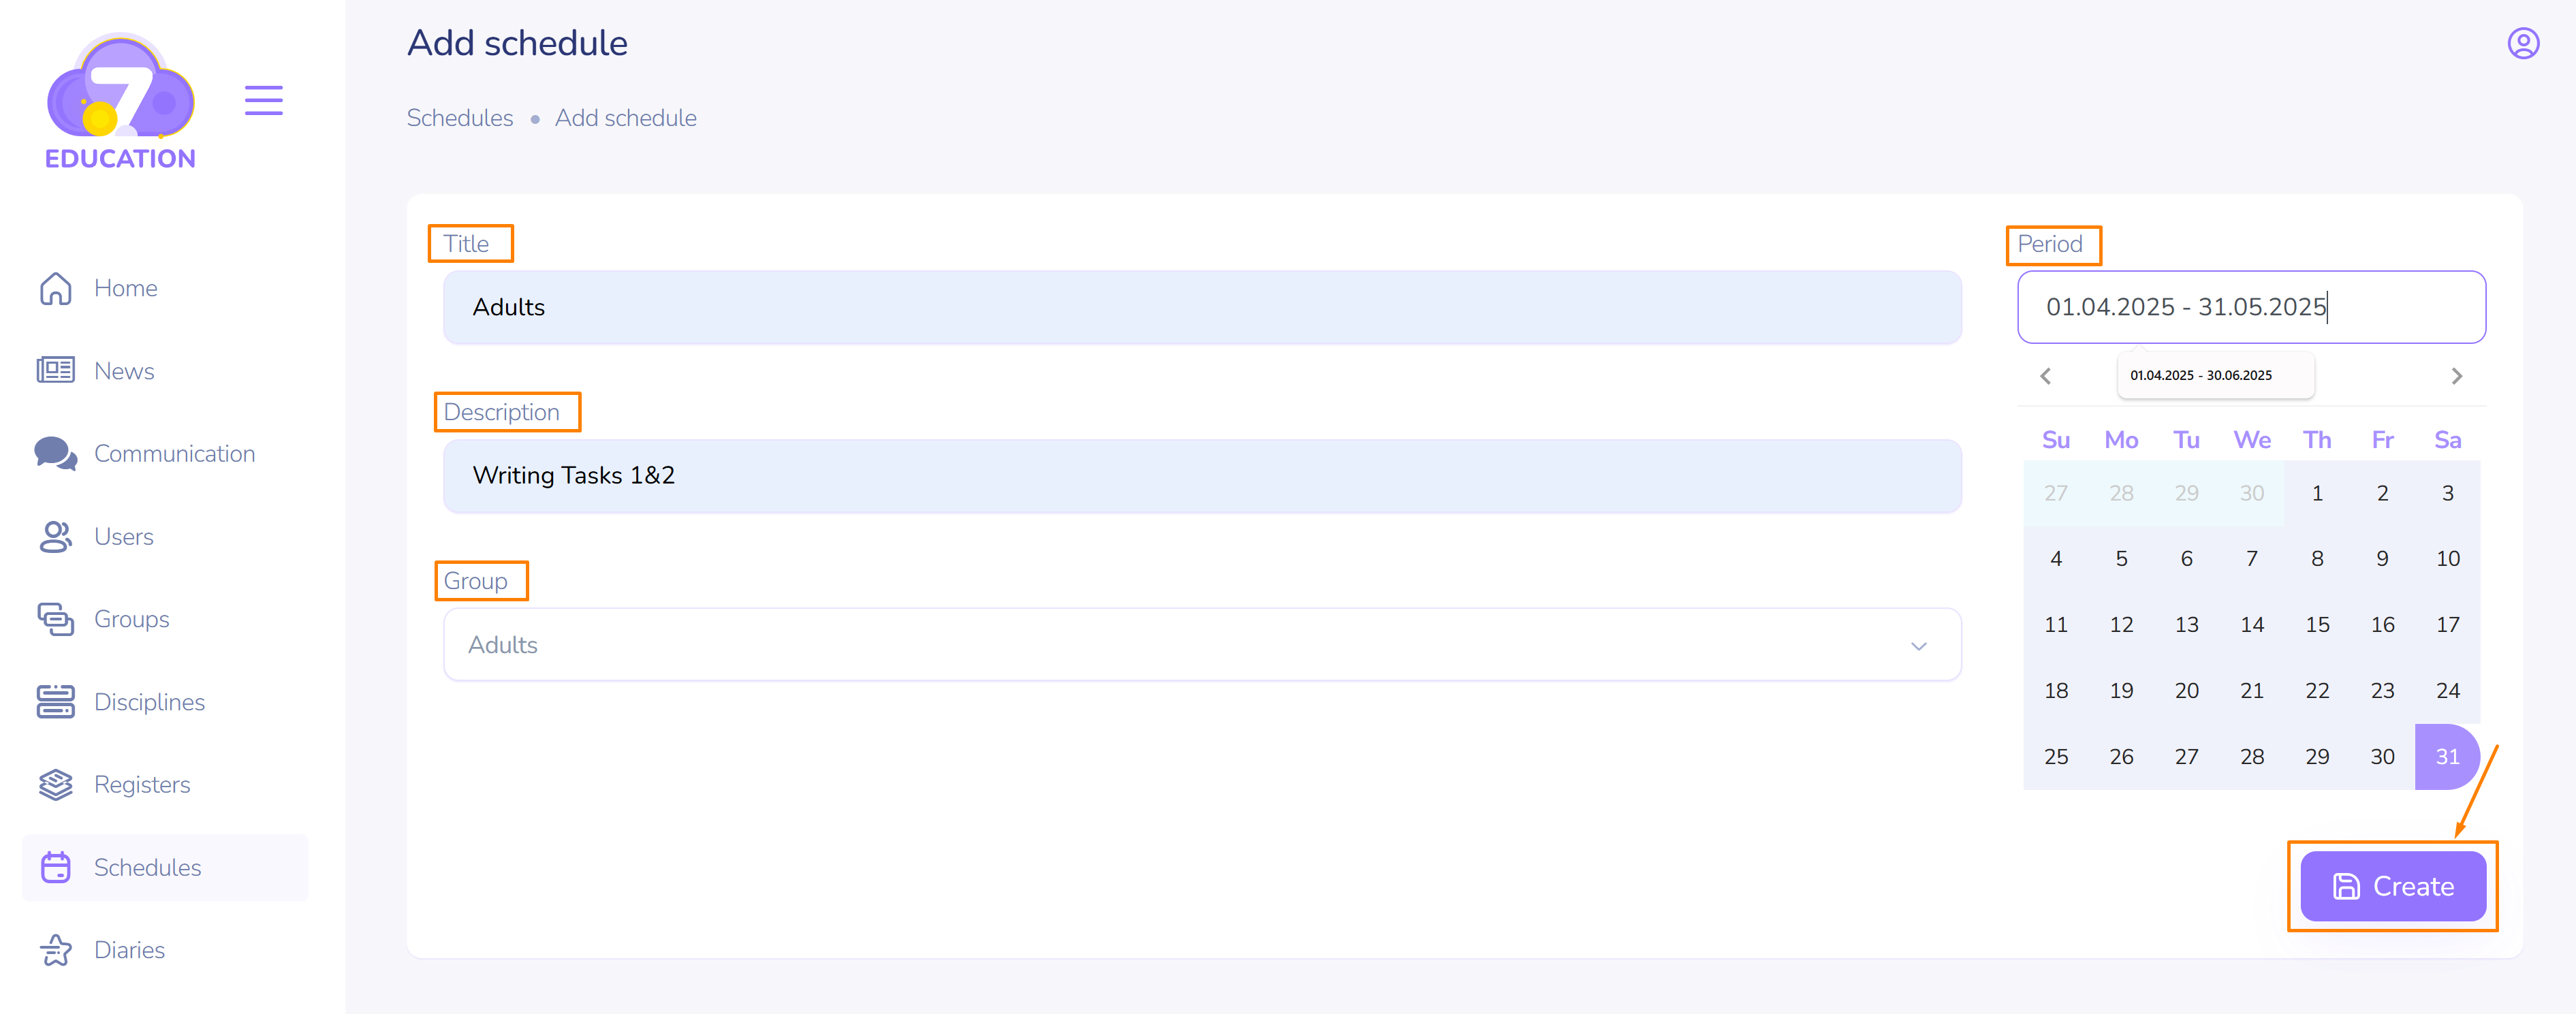
- Specify the name and description of the schedule, select the group and the academic period (semester, quarter, month, etc.).
- Click Create.
Important! It is recommended to first create the group, add users to it (at least one), and then create the schedule.
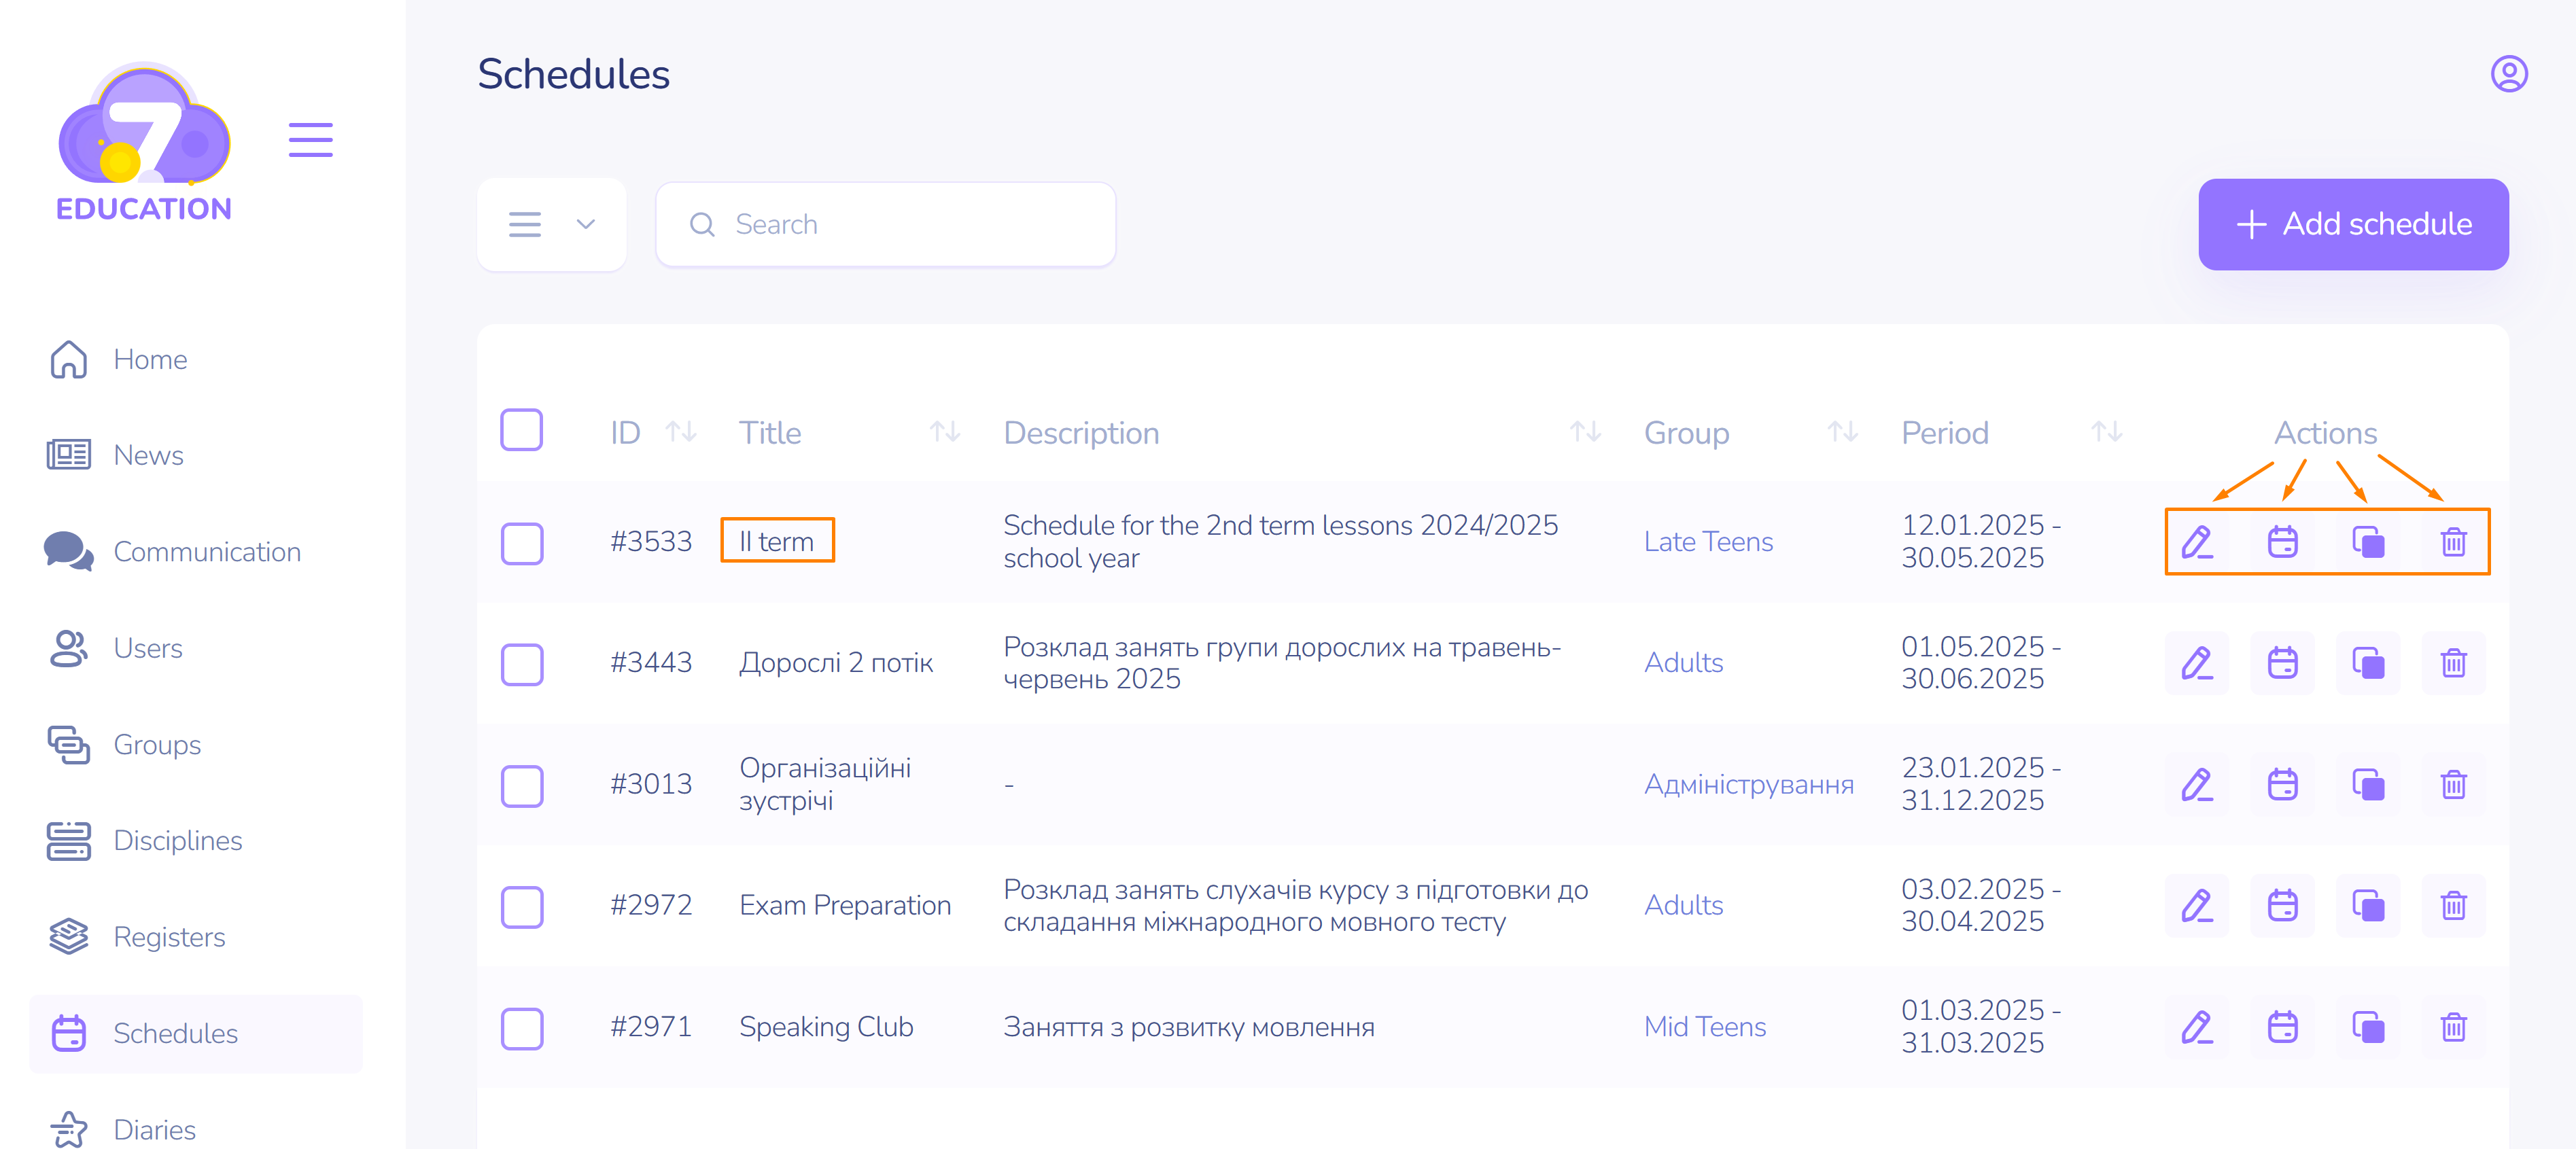
The newly created schedule will appear in the top row of the list.
It can now be edited, viewed, copied, or deleted using the corresponding button in the Actions section.
Schedule Items
You can add the necessary sessions for a specific group to the created timetable. To do this:
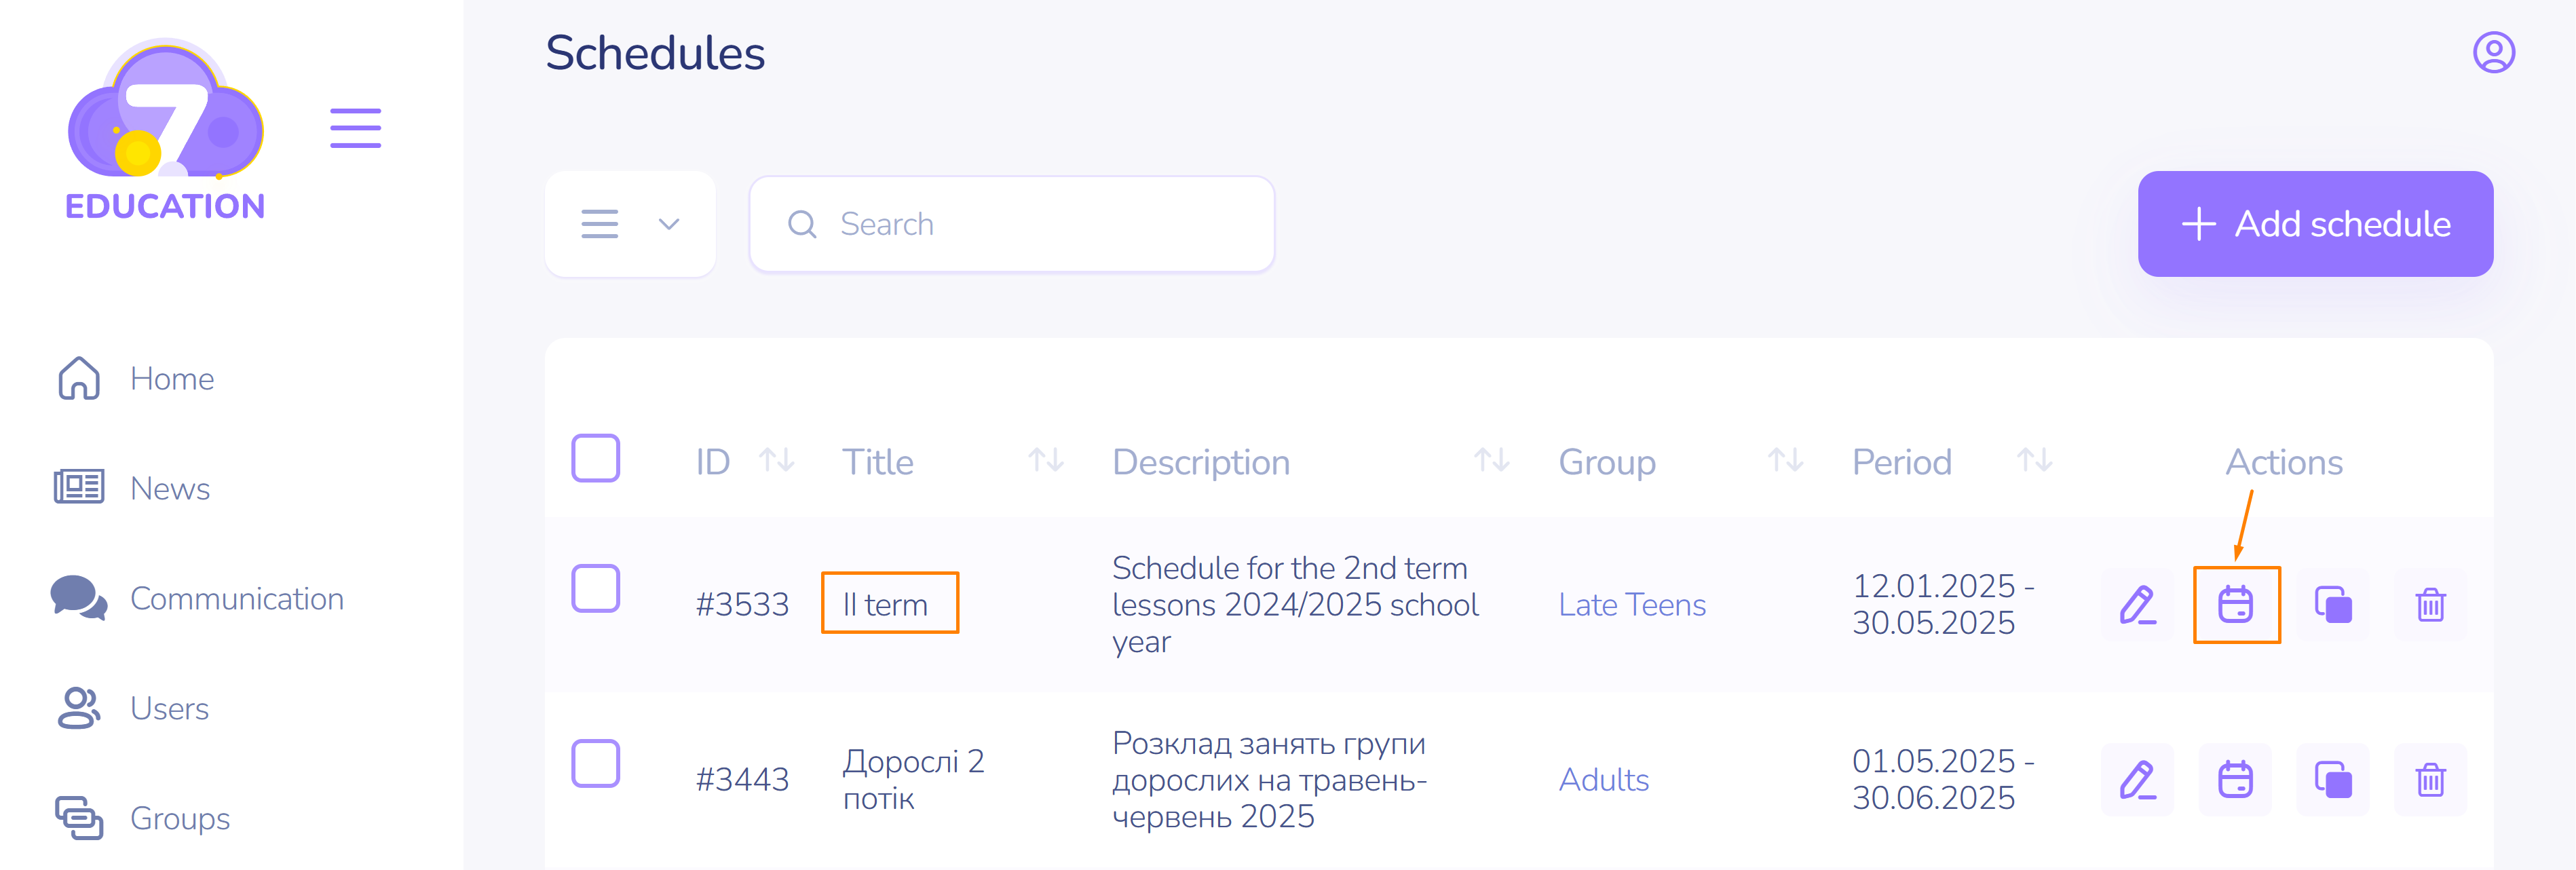
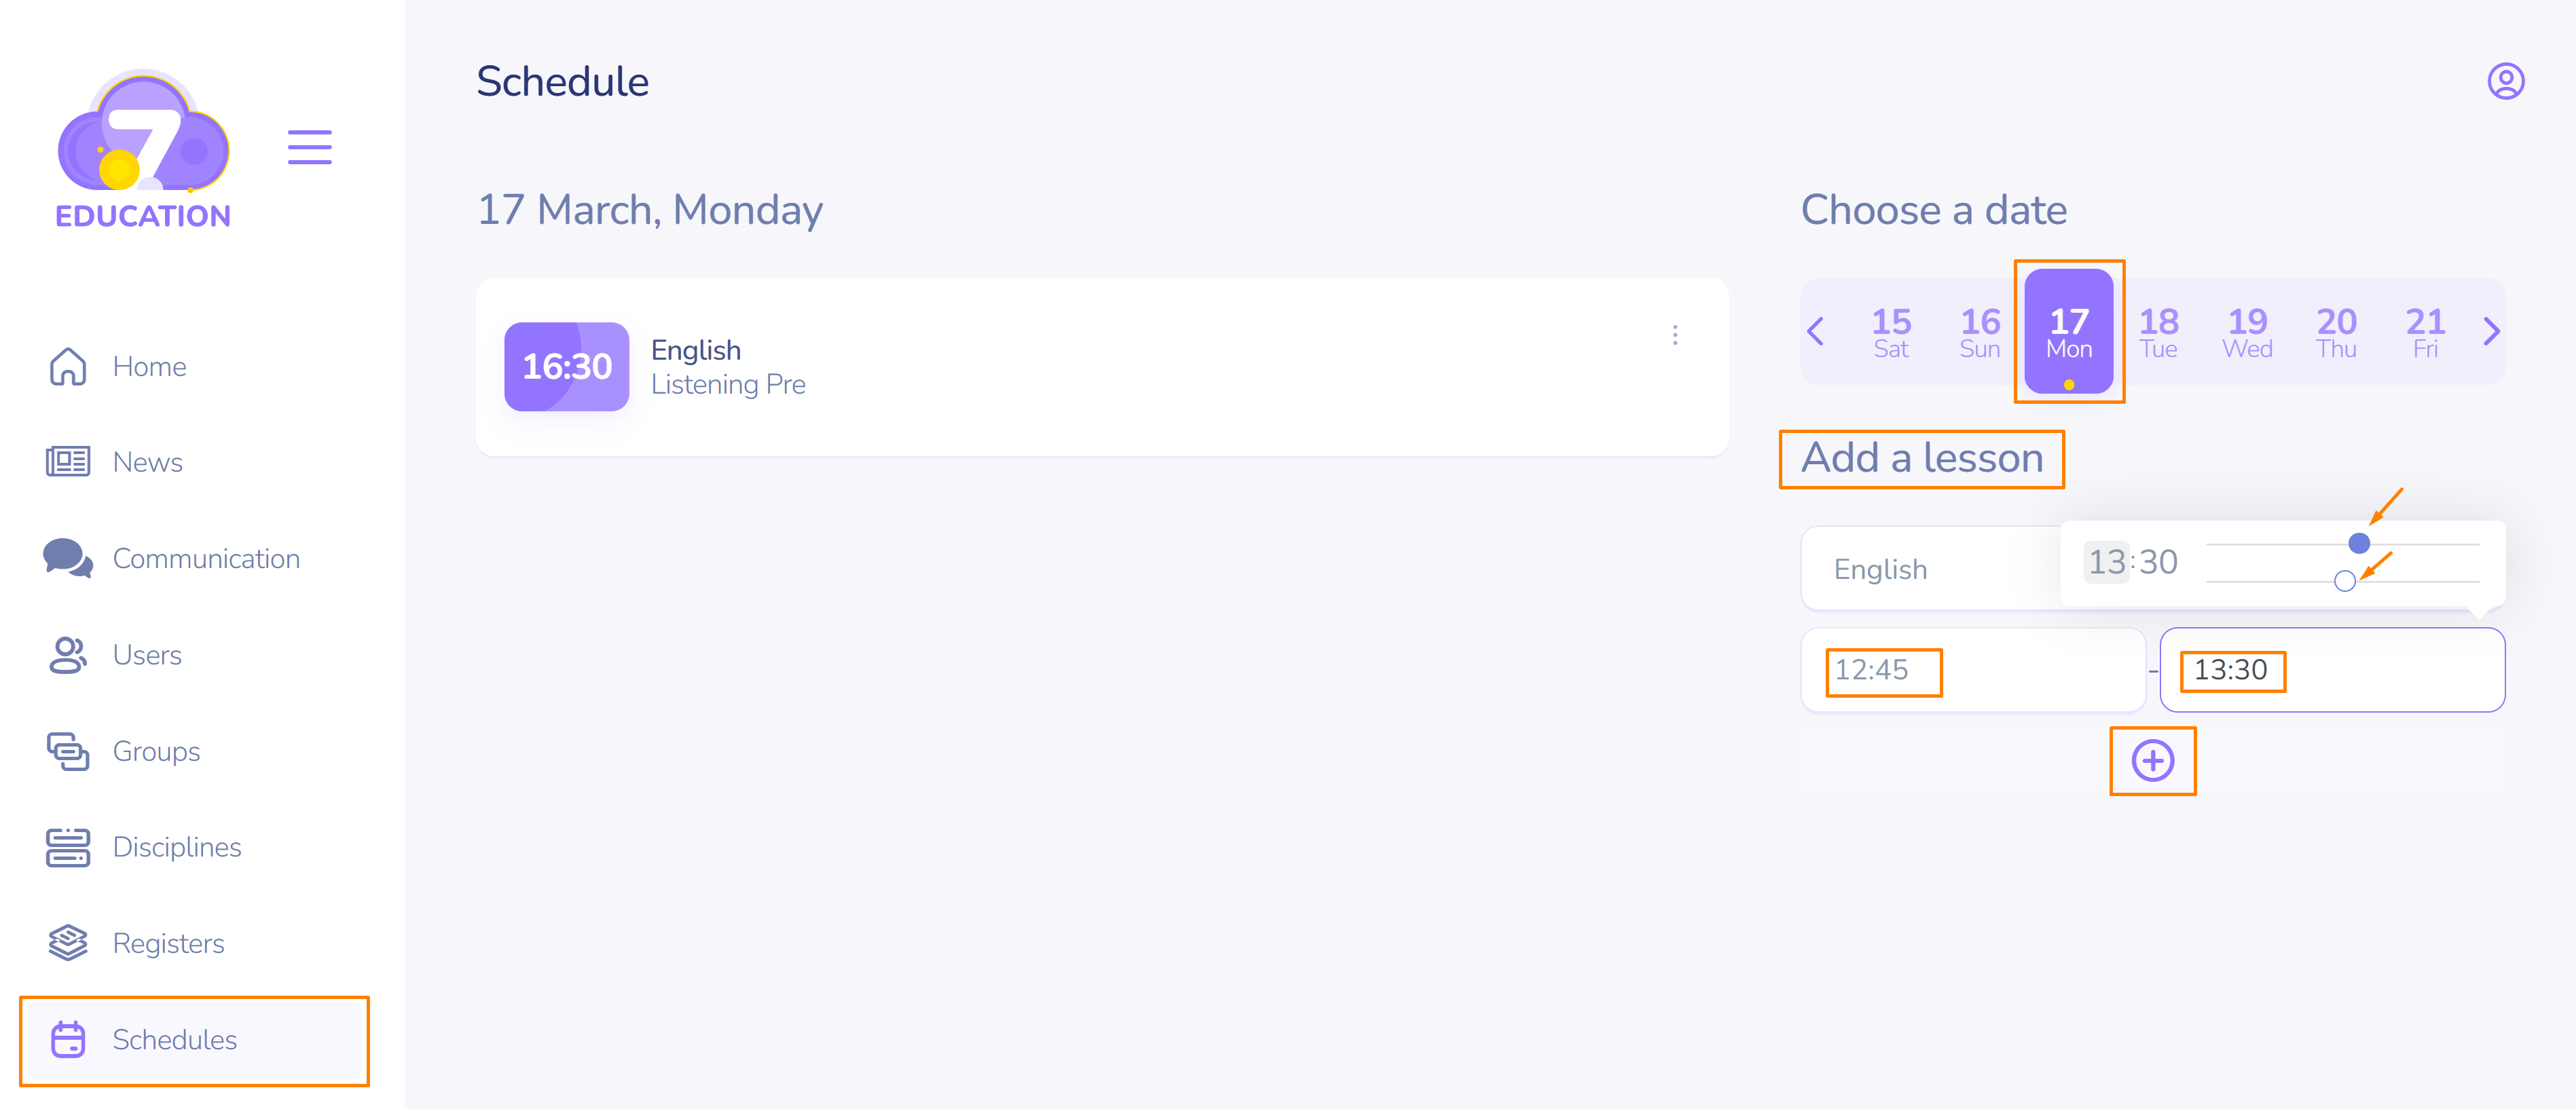
- Click View.
- Select a day and subject, then set the start and end time of the lesson using the sliders.
- Click Add.
- Continue filling in theschedule with all the necessary lessons in the same way.
Important! Newly created schedule items include the time slot for the specified subjects but do not have lesson content. This can easily be checked by clicking the three dots on the right of the subject name row. If you see two options for adding and removing, the lesson content is missing.
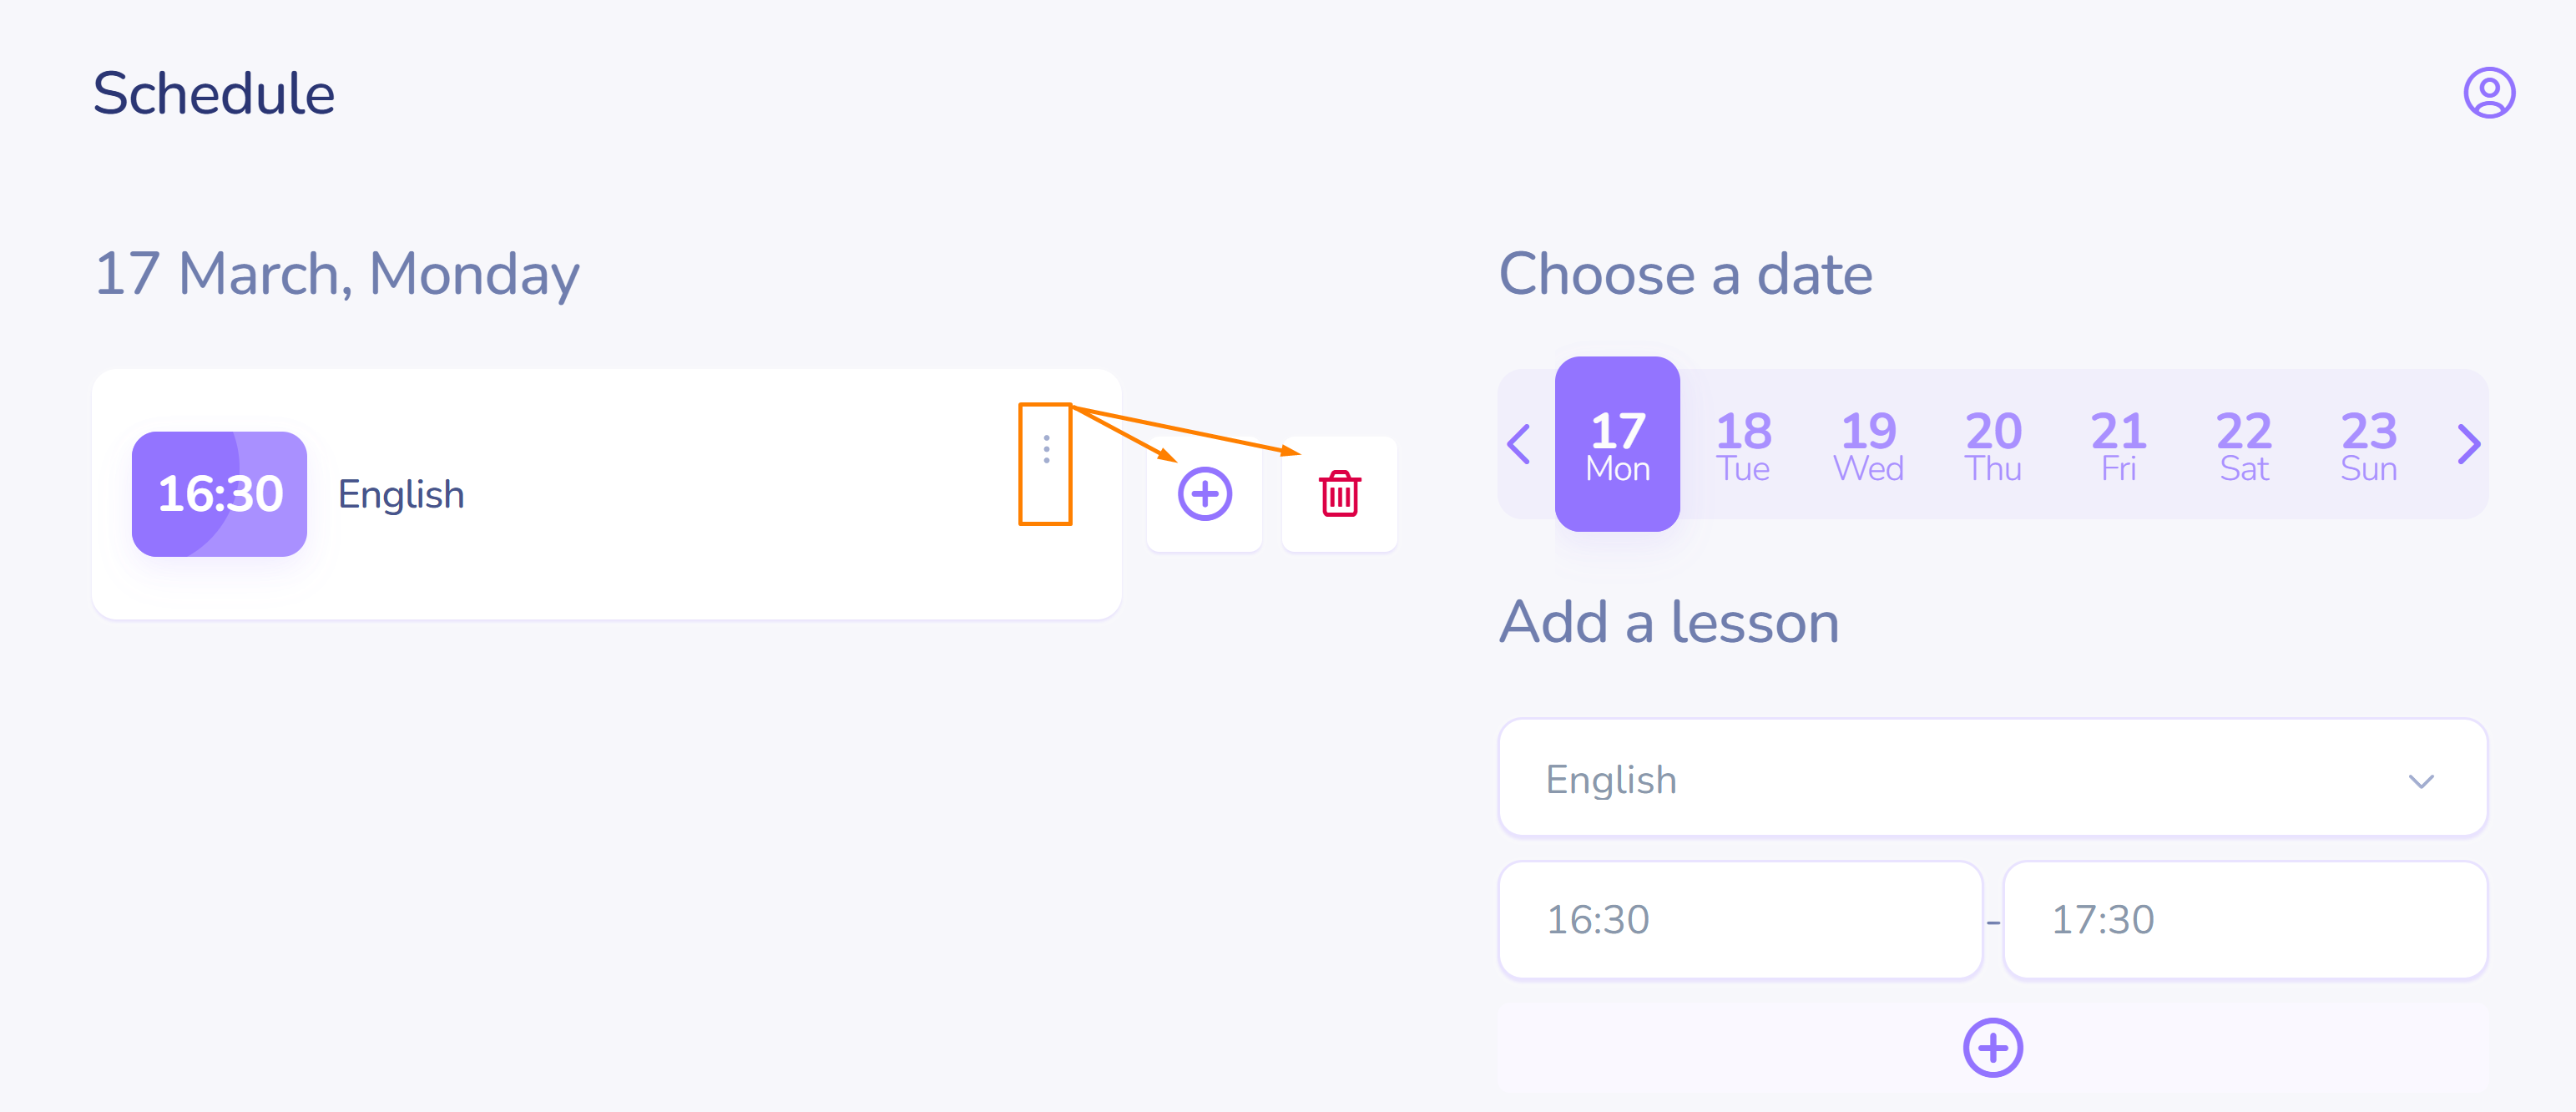
It needs to be added later.
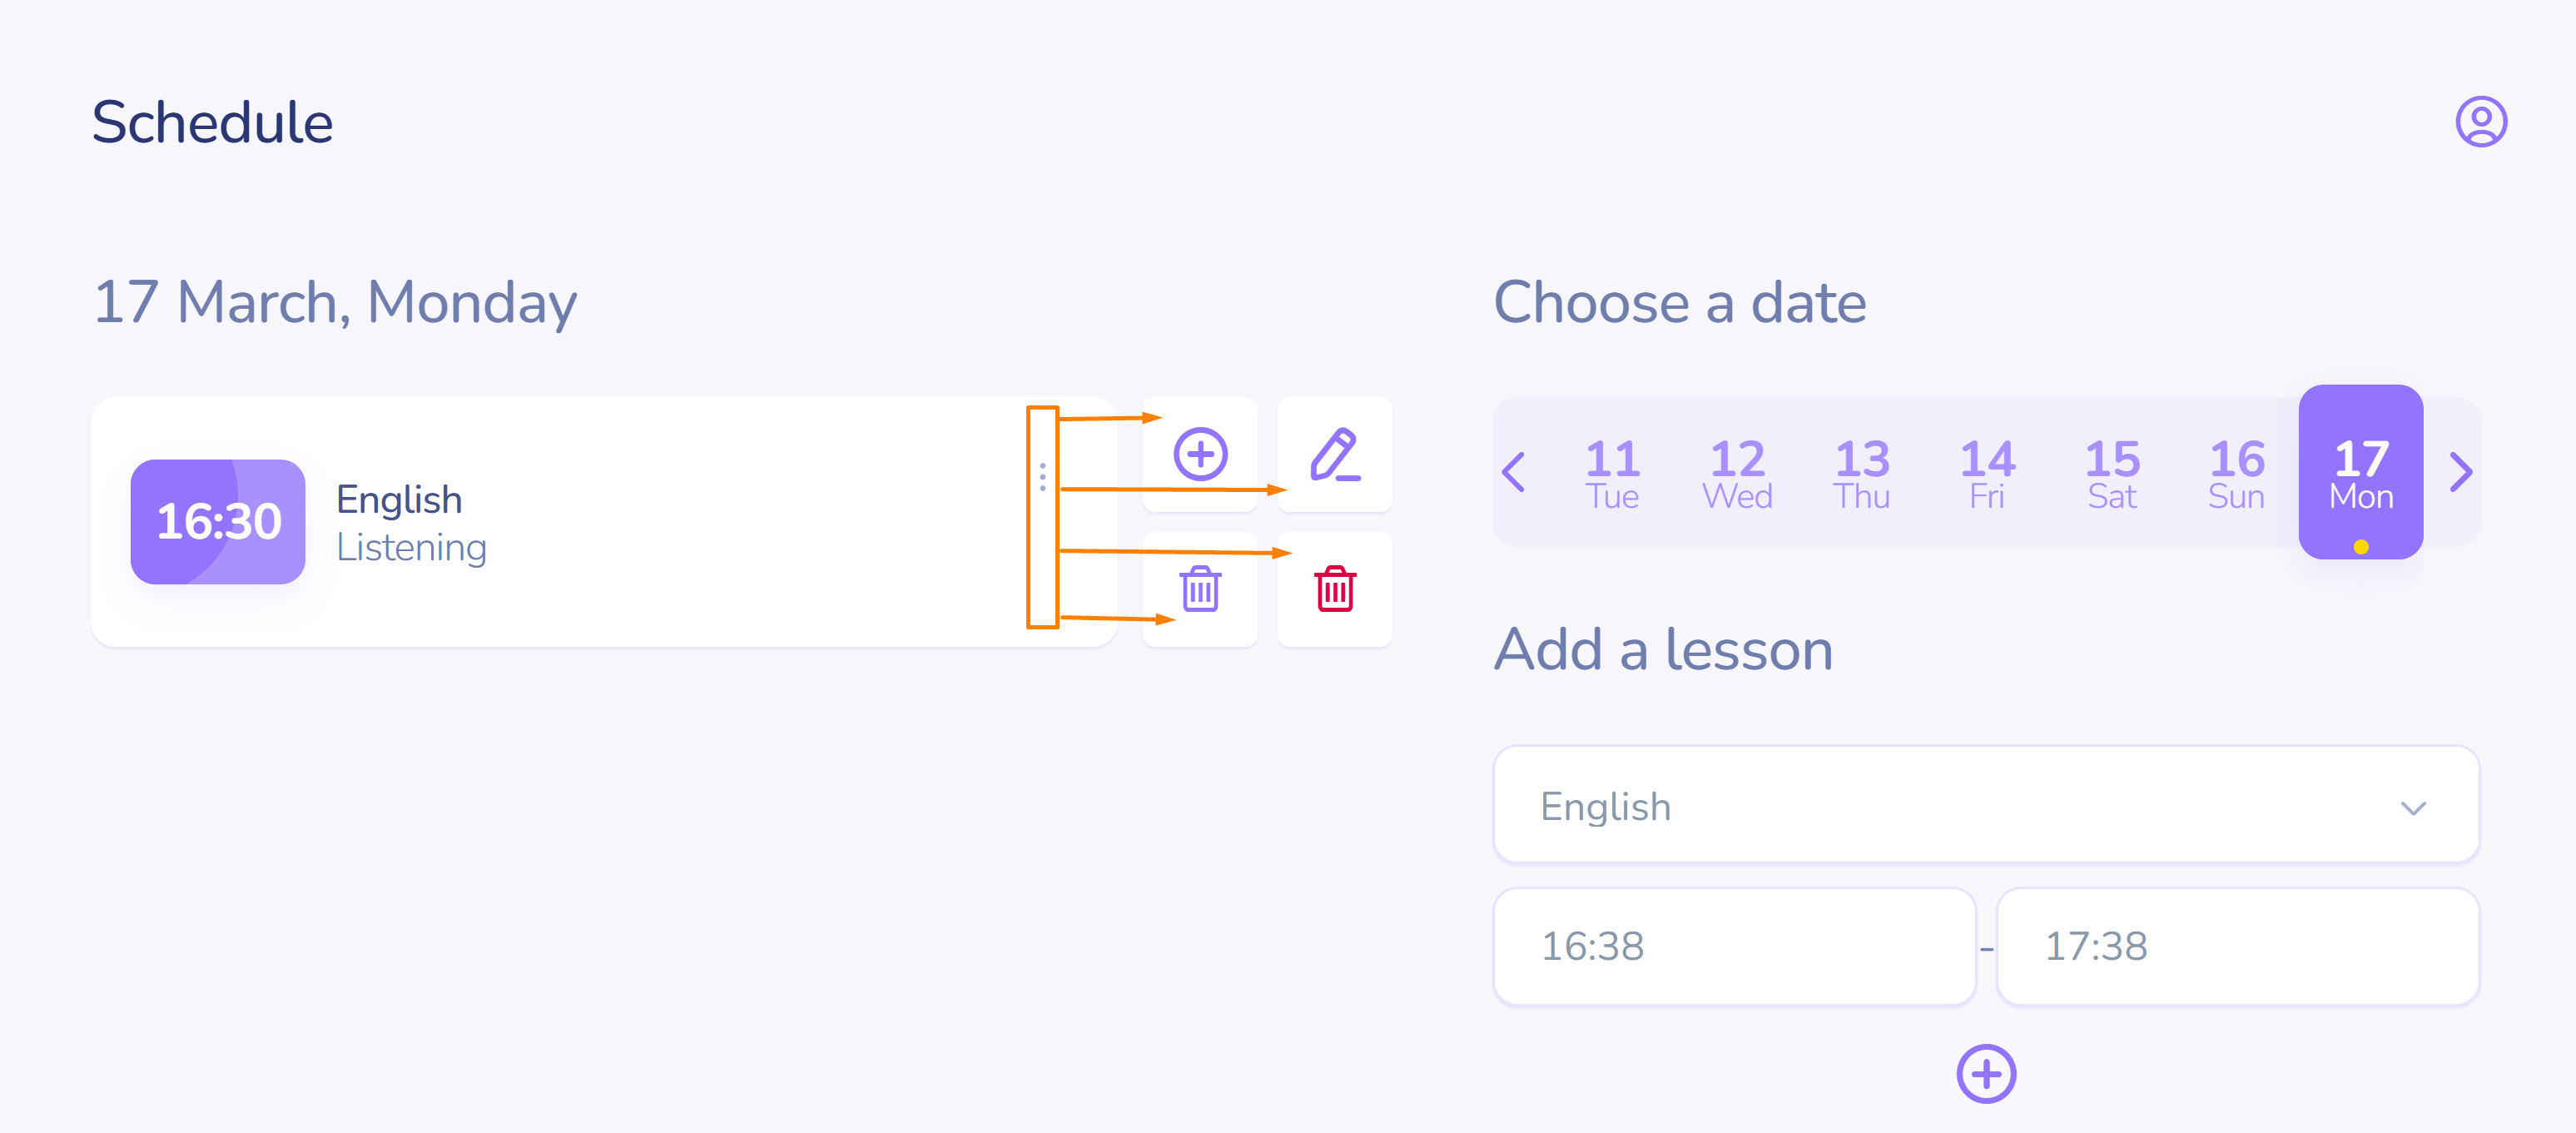
If, when clicking the three dots in the subject name row, you see 4 options, the lesson content has been added. These options allow you to add another lesson with content, edit the existing one, delete the lesson with content (left trash bin), and delete the lesson as a time slot, as a schedule item (right trash bin).
How to copy a schedule
Typically, a timetable is created for the week.
If the elements (lesson times) hardly change, the weekly timetable can simply be copied:
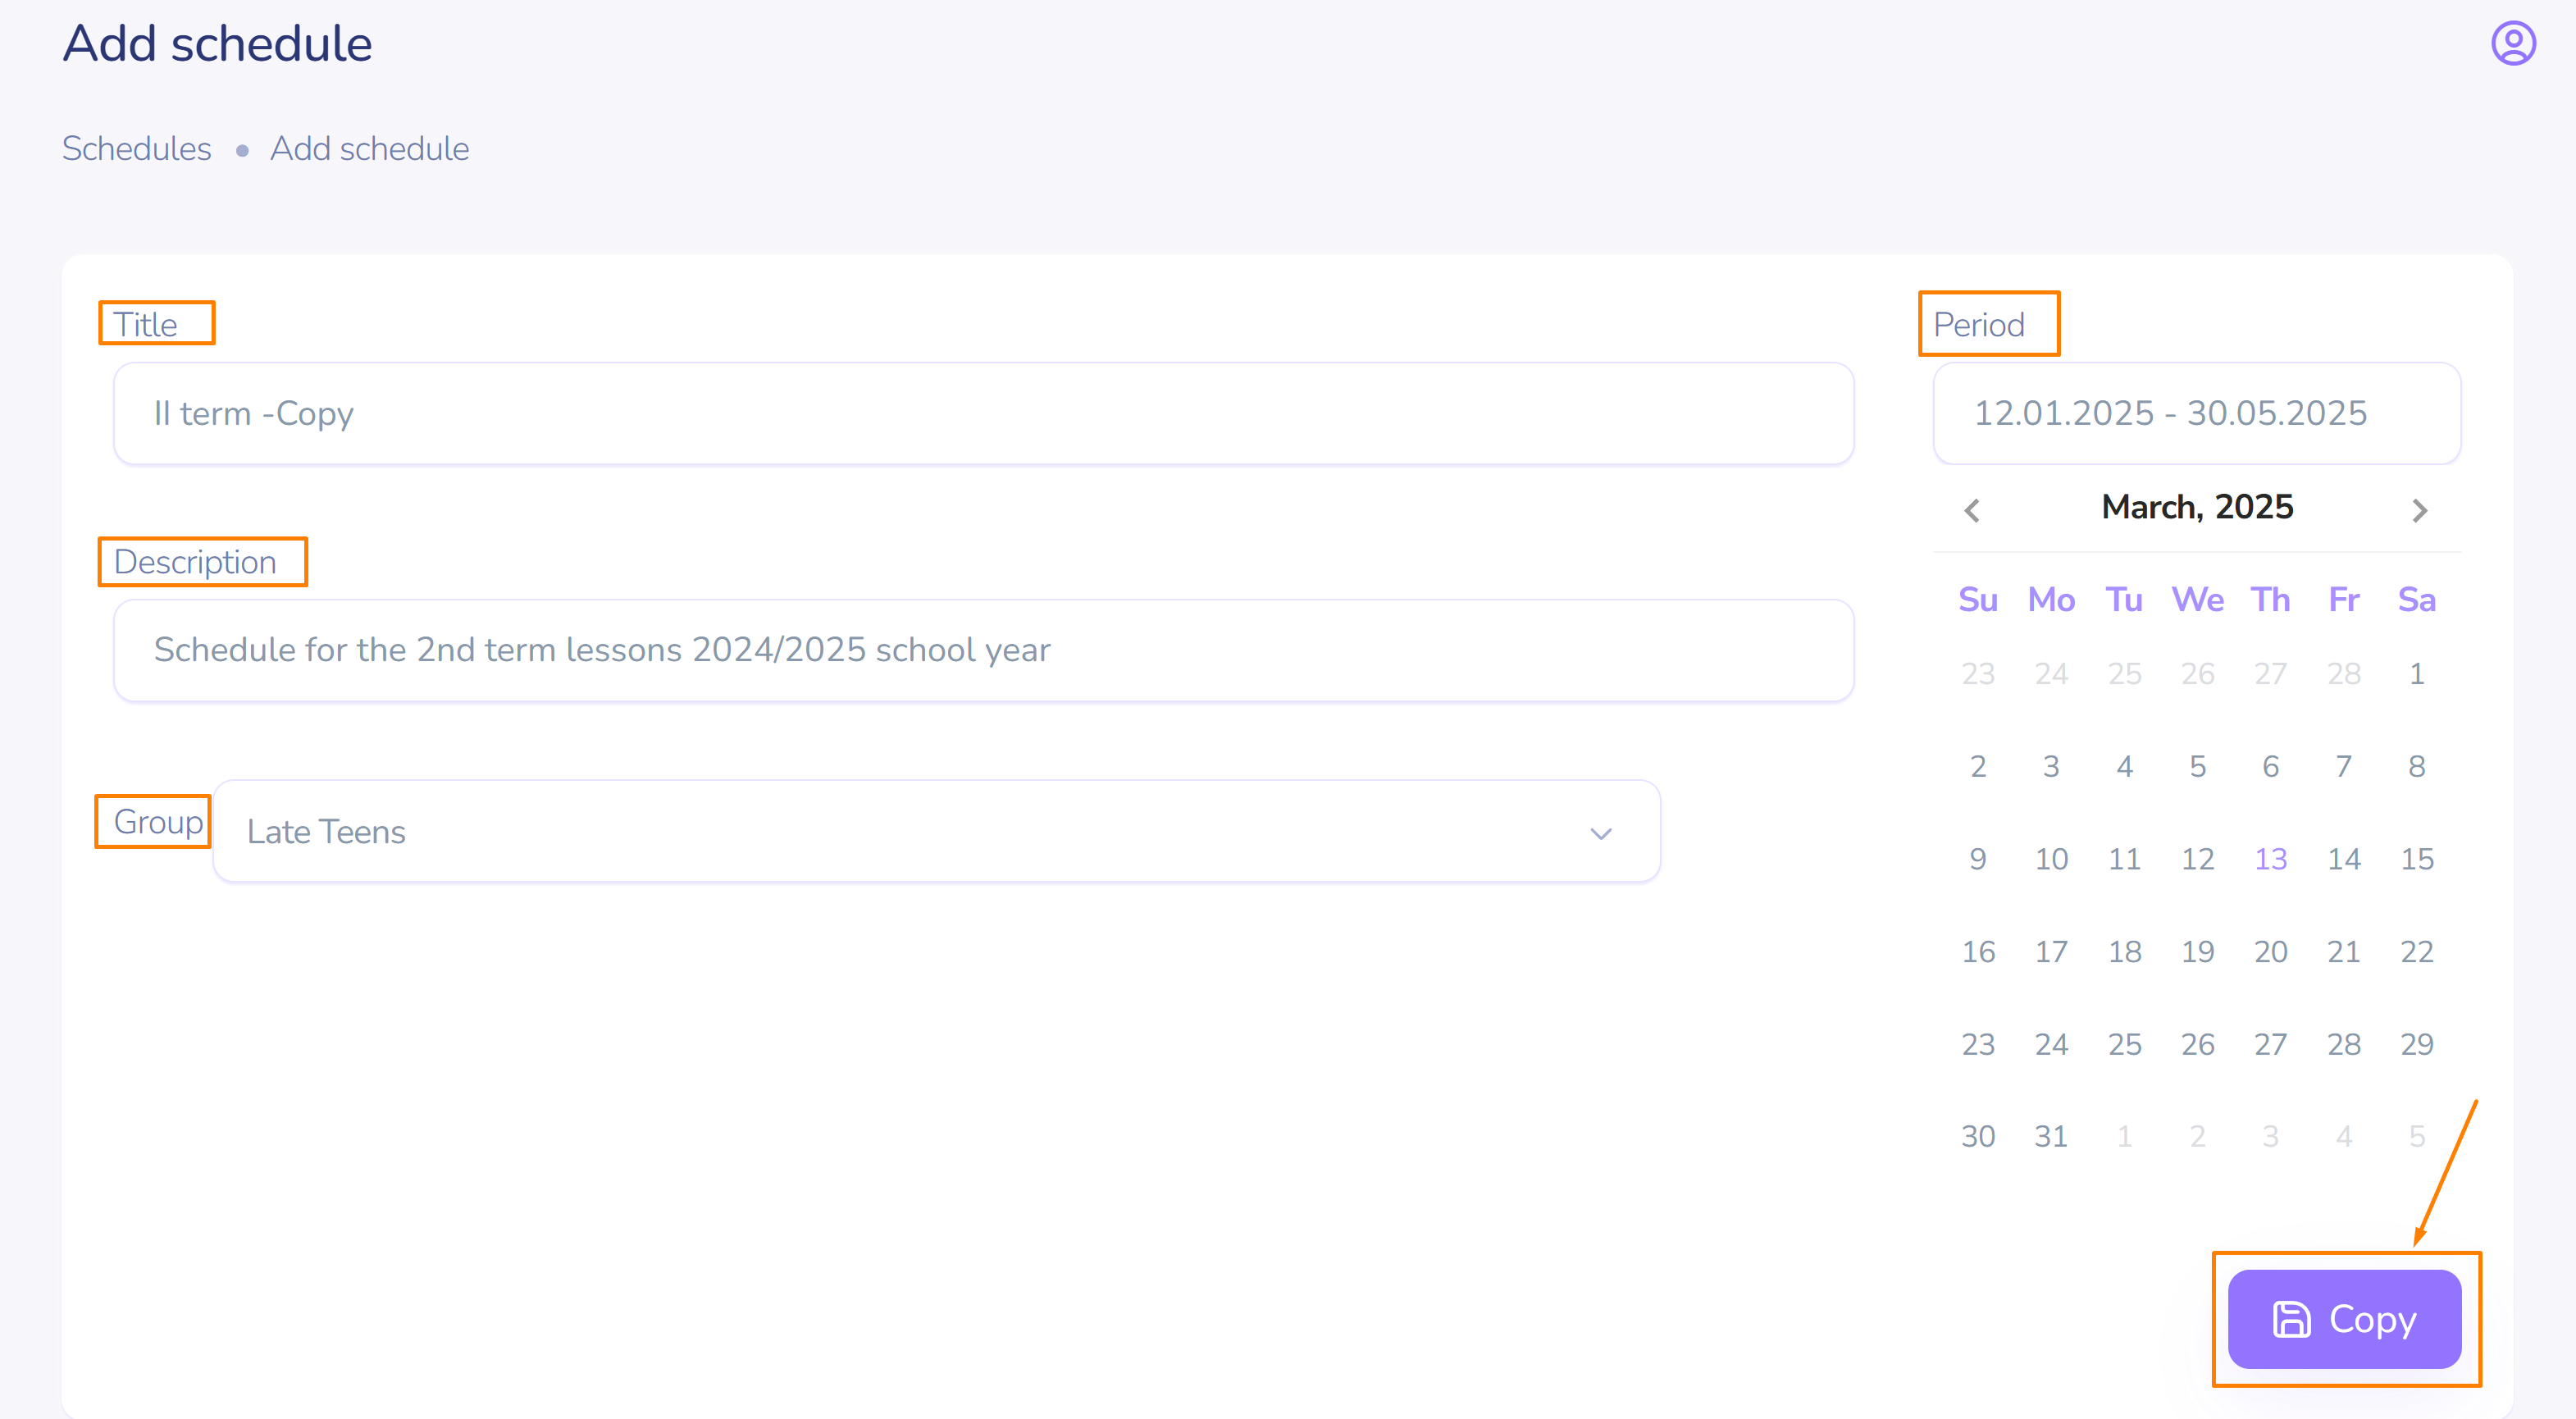
- Edit the name of the copied timetable.
- Select the new academic period.
- Click Copy.
Important! The original or copied timetable can always be edited.
The newly created copy of the timetable only contains timetable items (lesson times) and does not include lesson content. These need to be added separately.