
Lessons
Before Creating a lesson
Creating a lesson requires the following components:
- A schedule for the planned date
- A section and topic for the lesson
- Prepared materials
How to create a lesson
Lessons can be created and edited by:
- School administrator
- Teacher
- Tutor
There are two ways to add a new lesson on a specific date and time in the schedule.

Creating a lesson. The first way
Schedules on the left sidebar
This method is convenient for creating lessons while viewing the schedule.
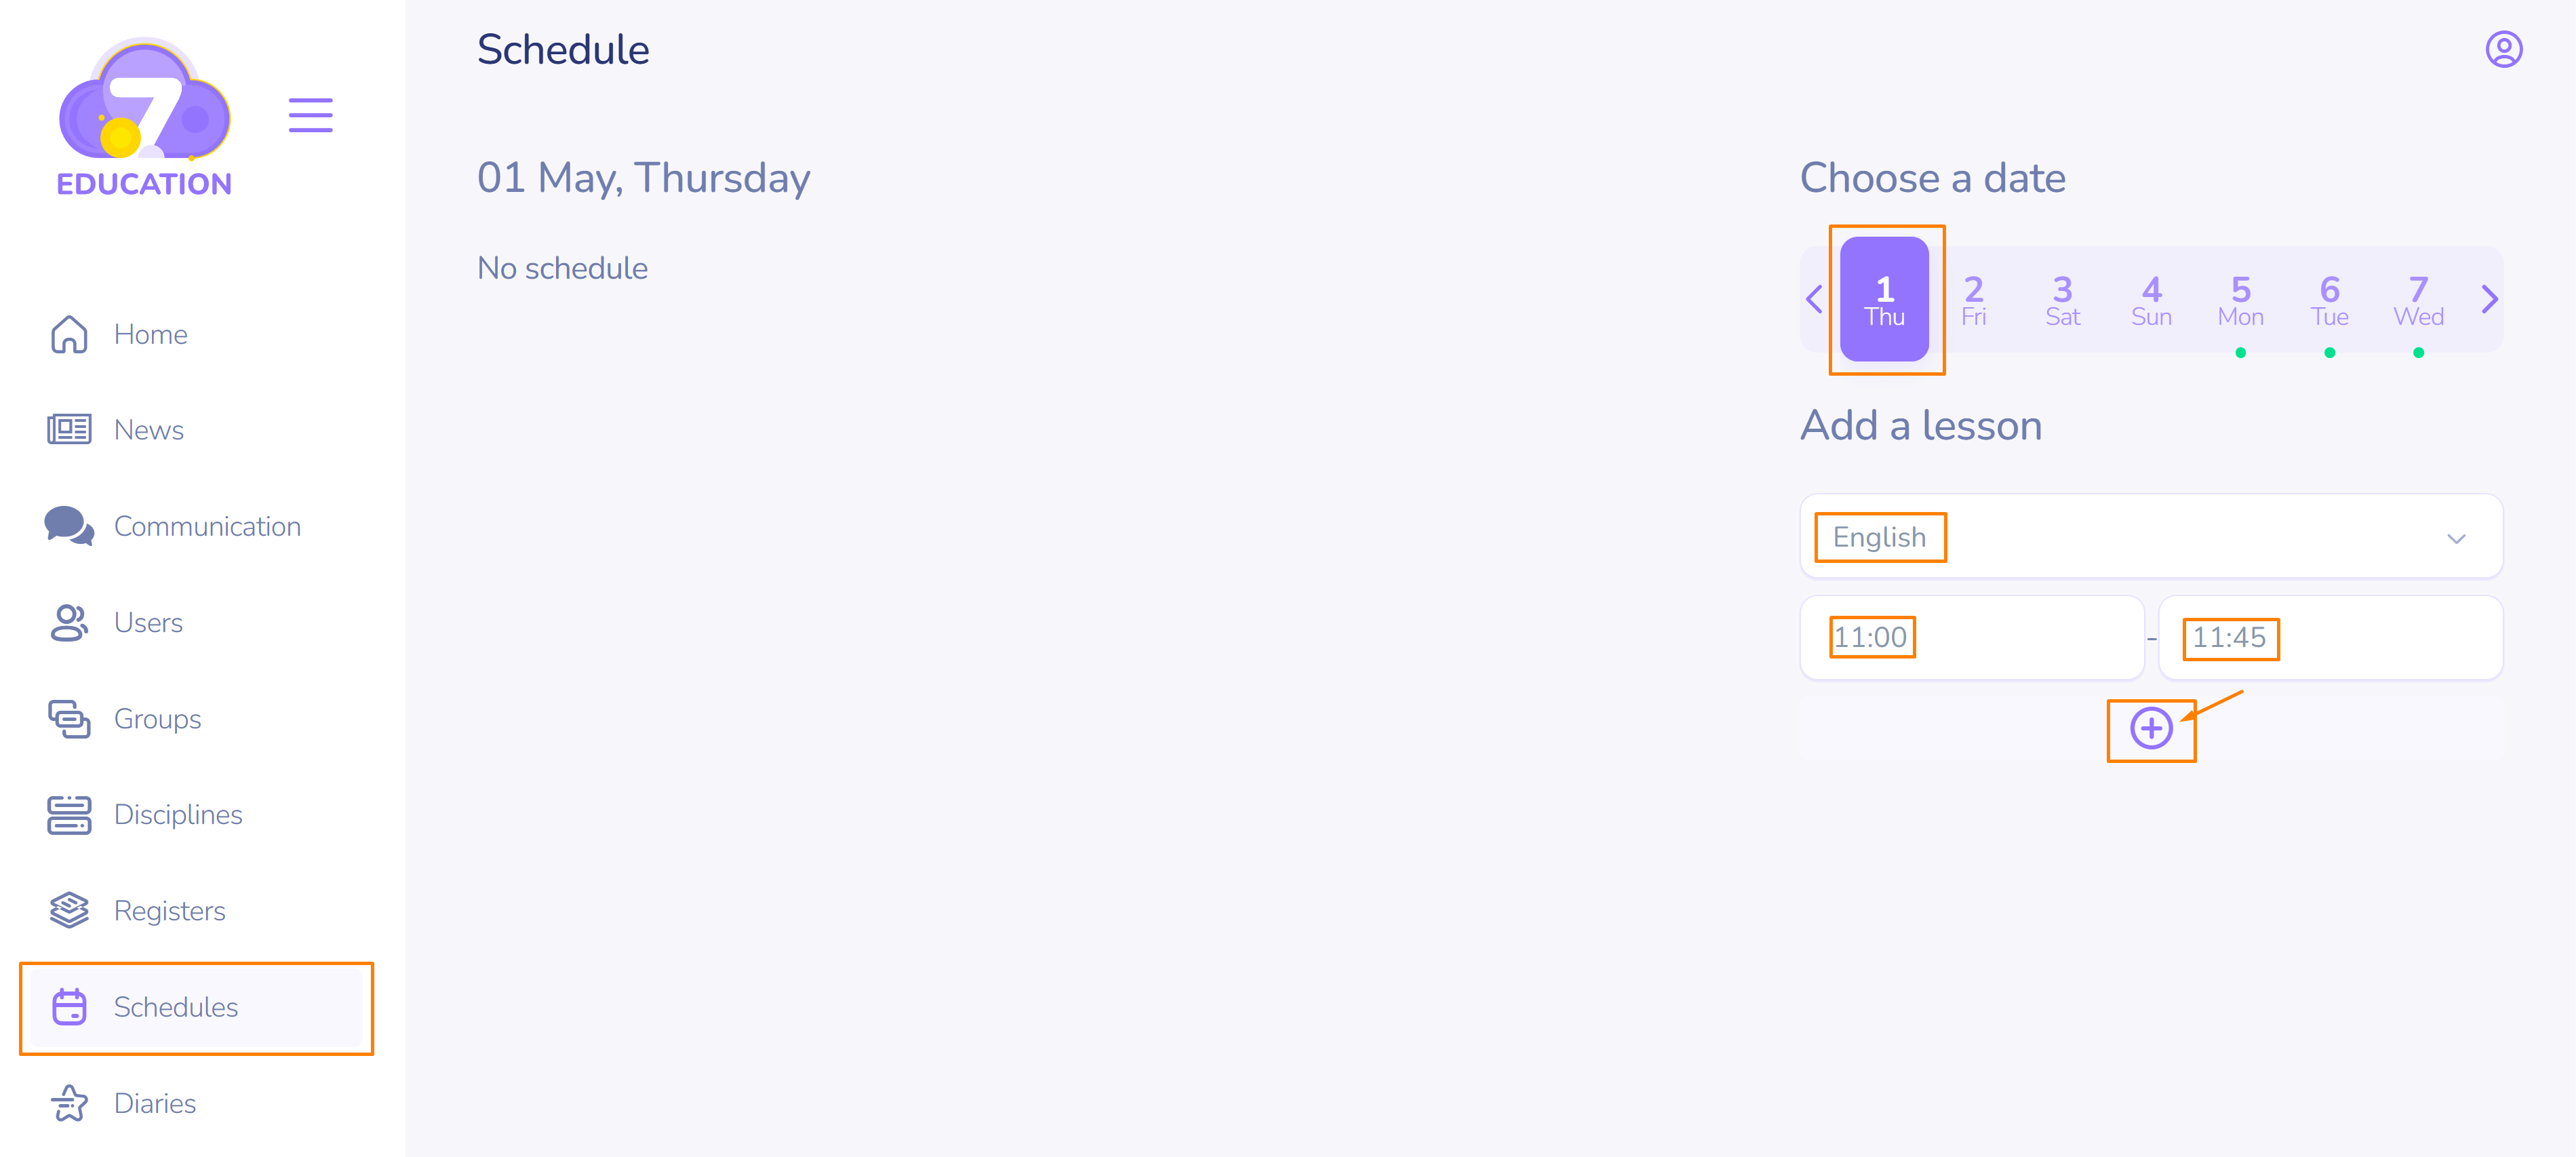
- After selecting the date in the schedule, review the list of disciplines taught on that day.
- Select the discipline for which you need to add a lesson.
- Press Create.
Important! In such a case you create only the time slot for the lesson. Its content should be added later.
Creating a lesson. The second way
Lessons on the left sidebar
This method is appropriate if the exact date for adding the lesson is known.
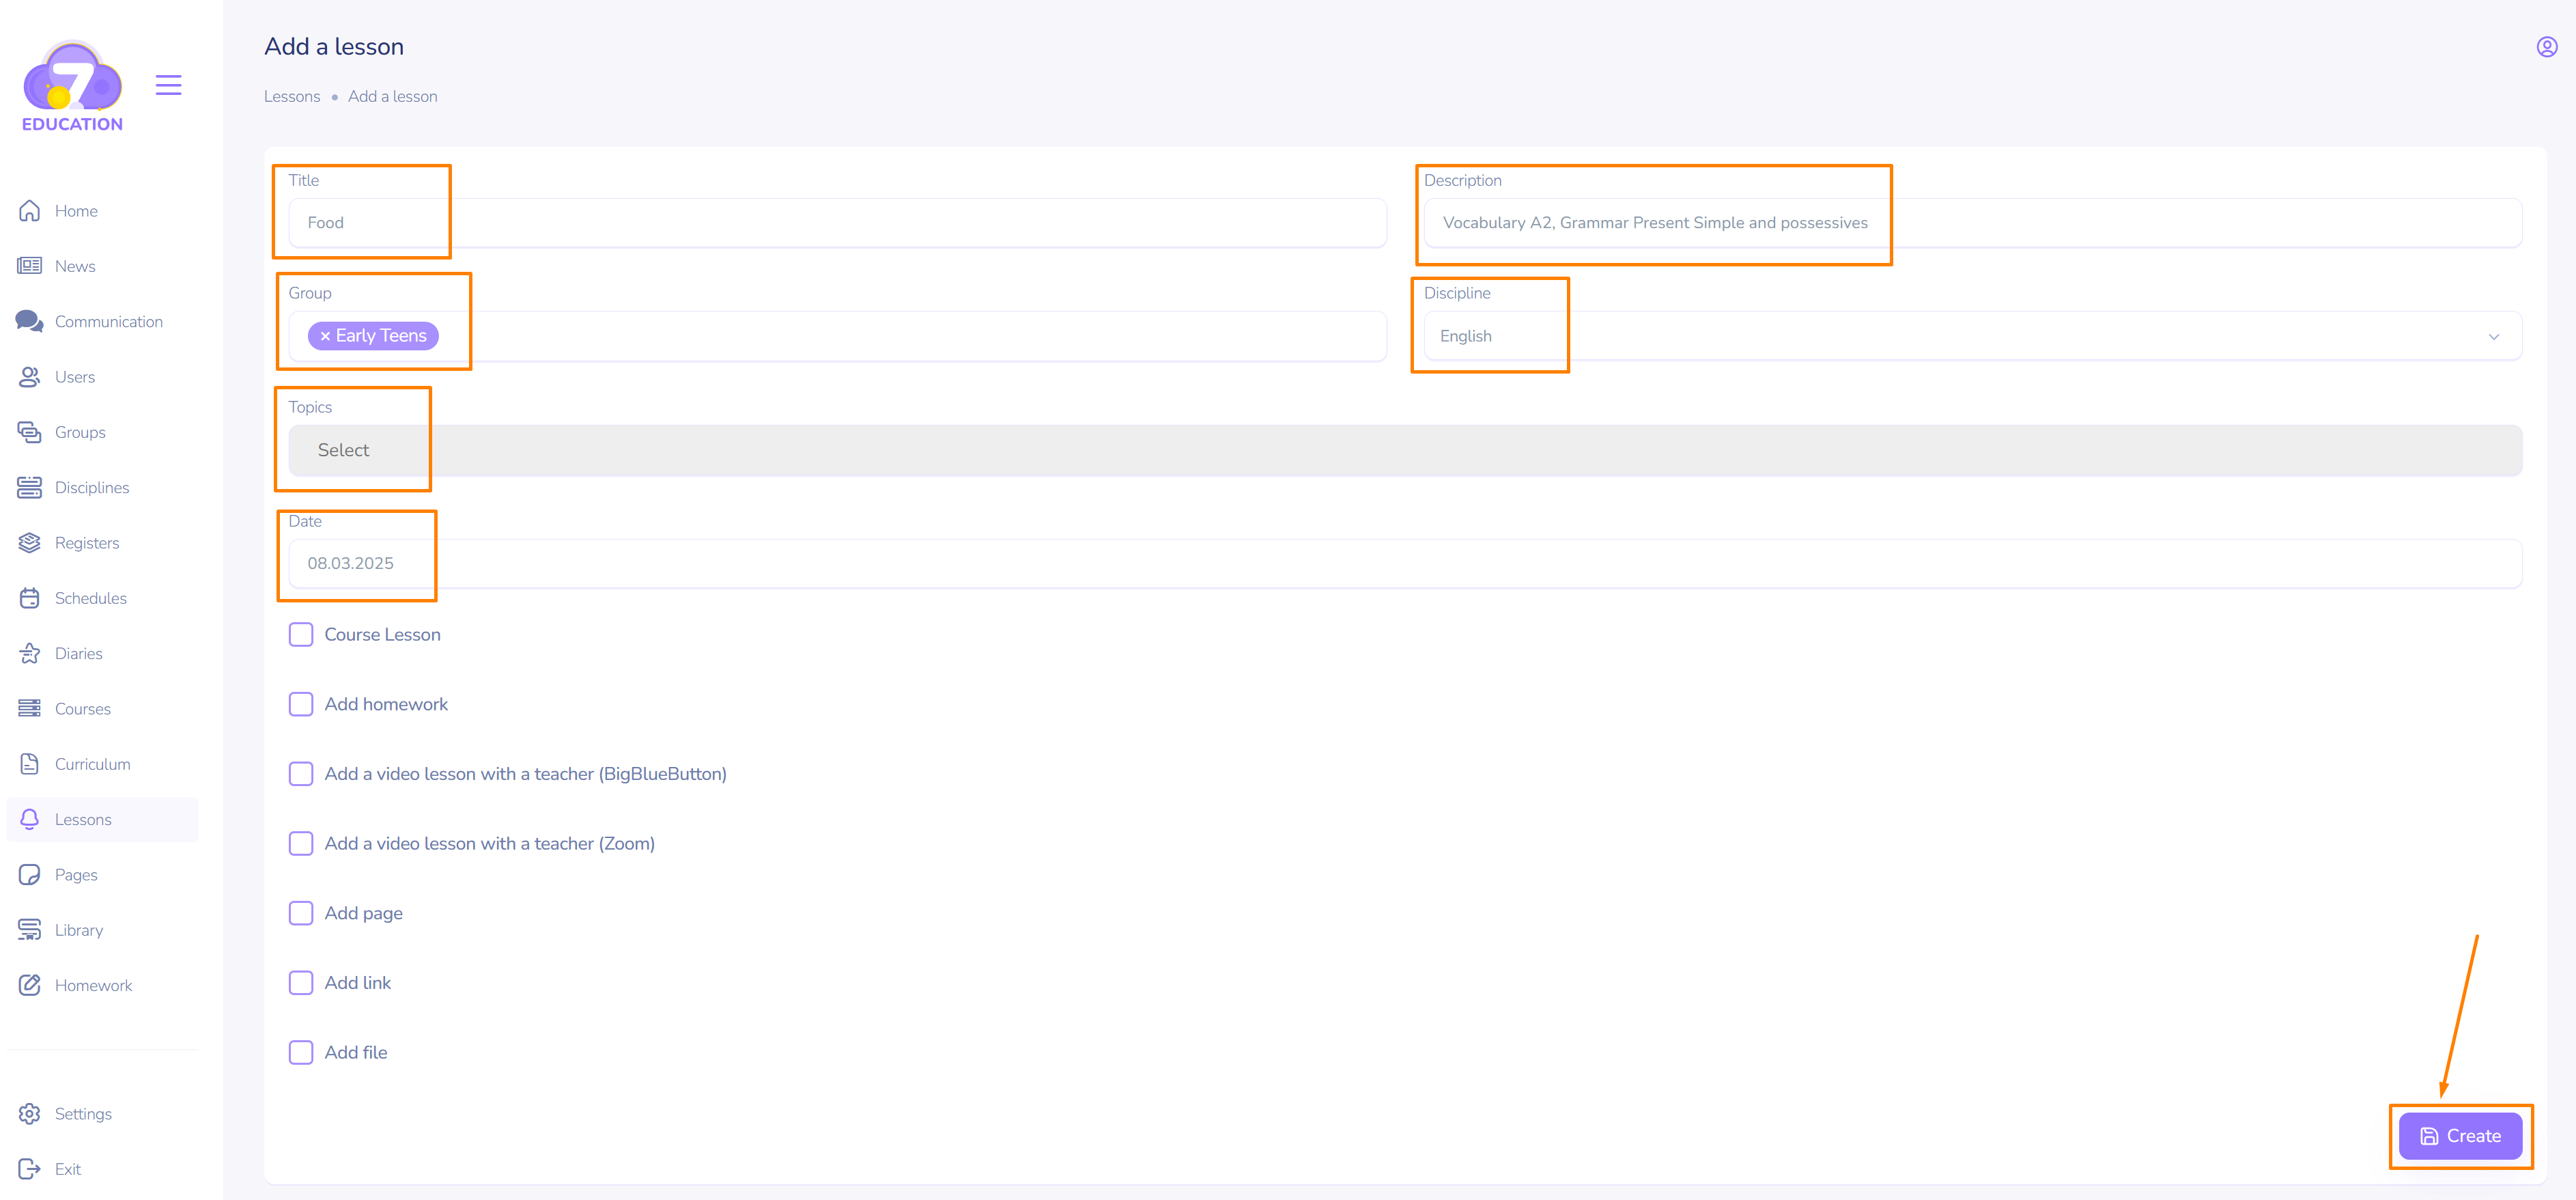
- Add a title and discription.
- Select a group of users, discipline, topics and a date.
- Press Create.
For a detailed guide on how to create lessons using both methods, watch the video.
What can be added to a lesson
The following elements are available to be added to any lesson:
- Pages
- Homework
- Video conference
- Files in the following formats: doc, docx, xls, xlsx, ppt, pptx, pdf, txt, zip, rar, jpeg, jpg, png
Lesson editing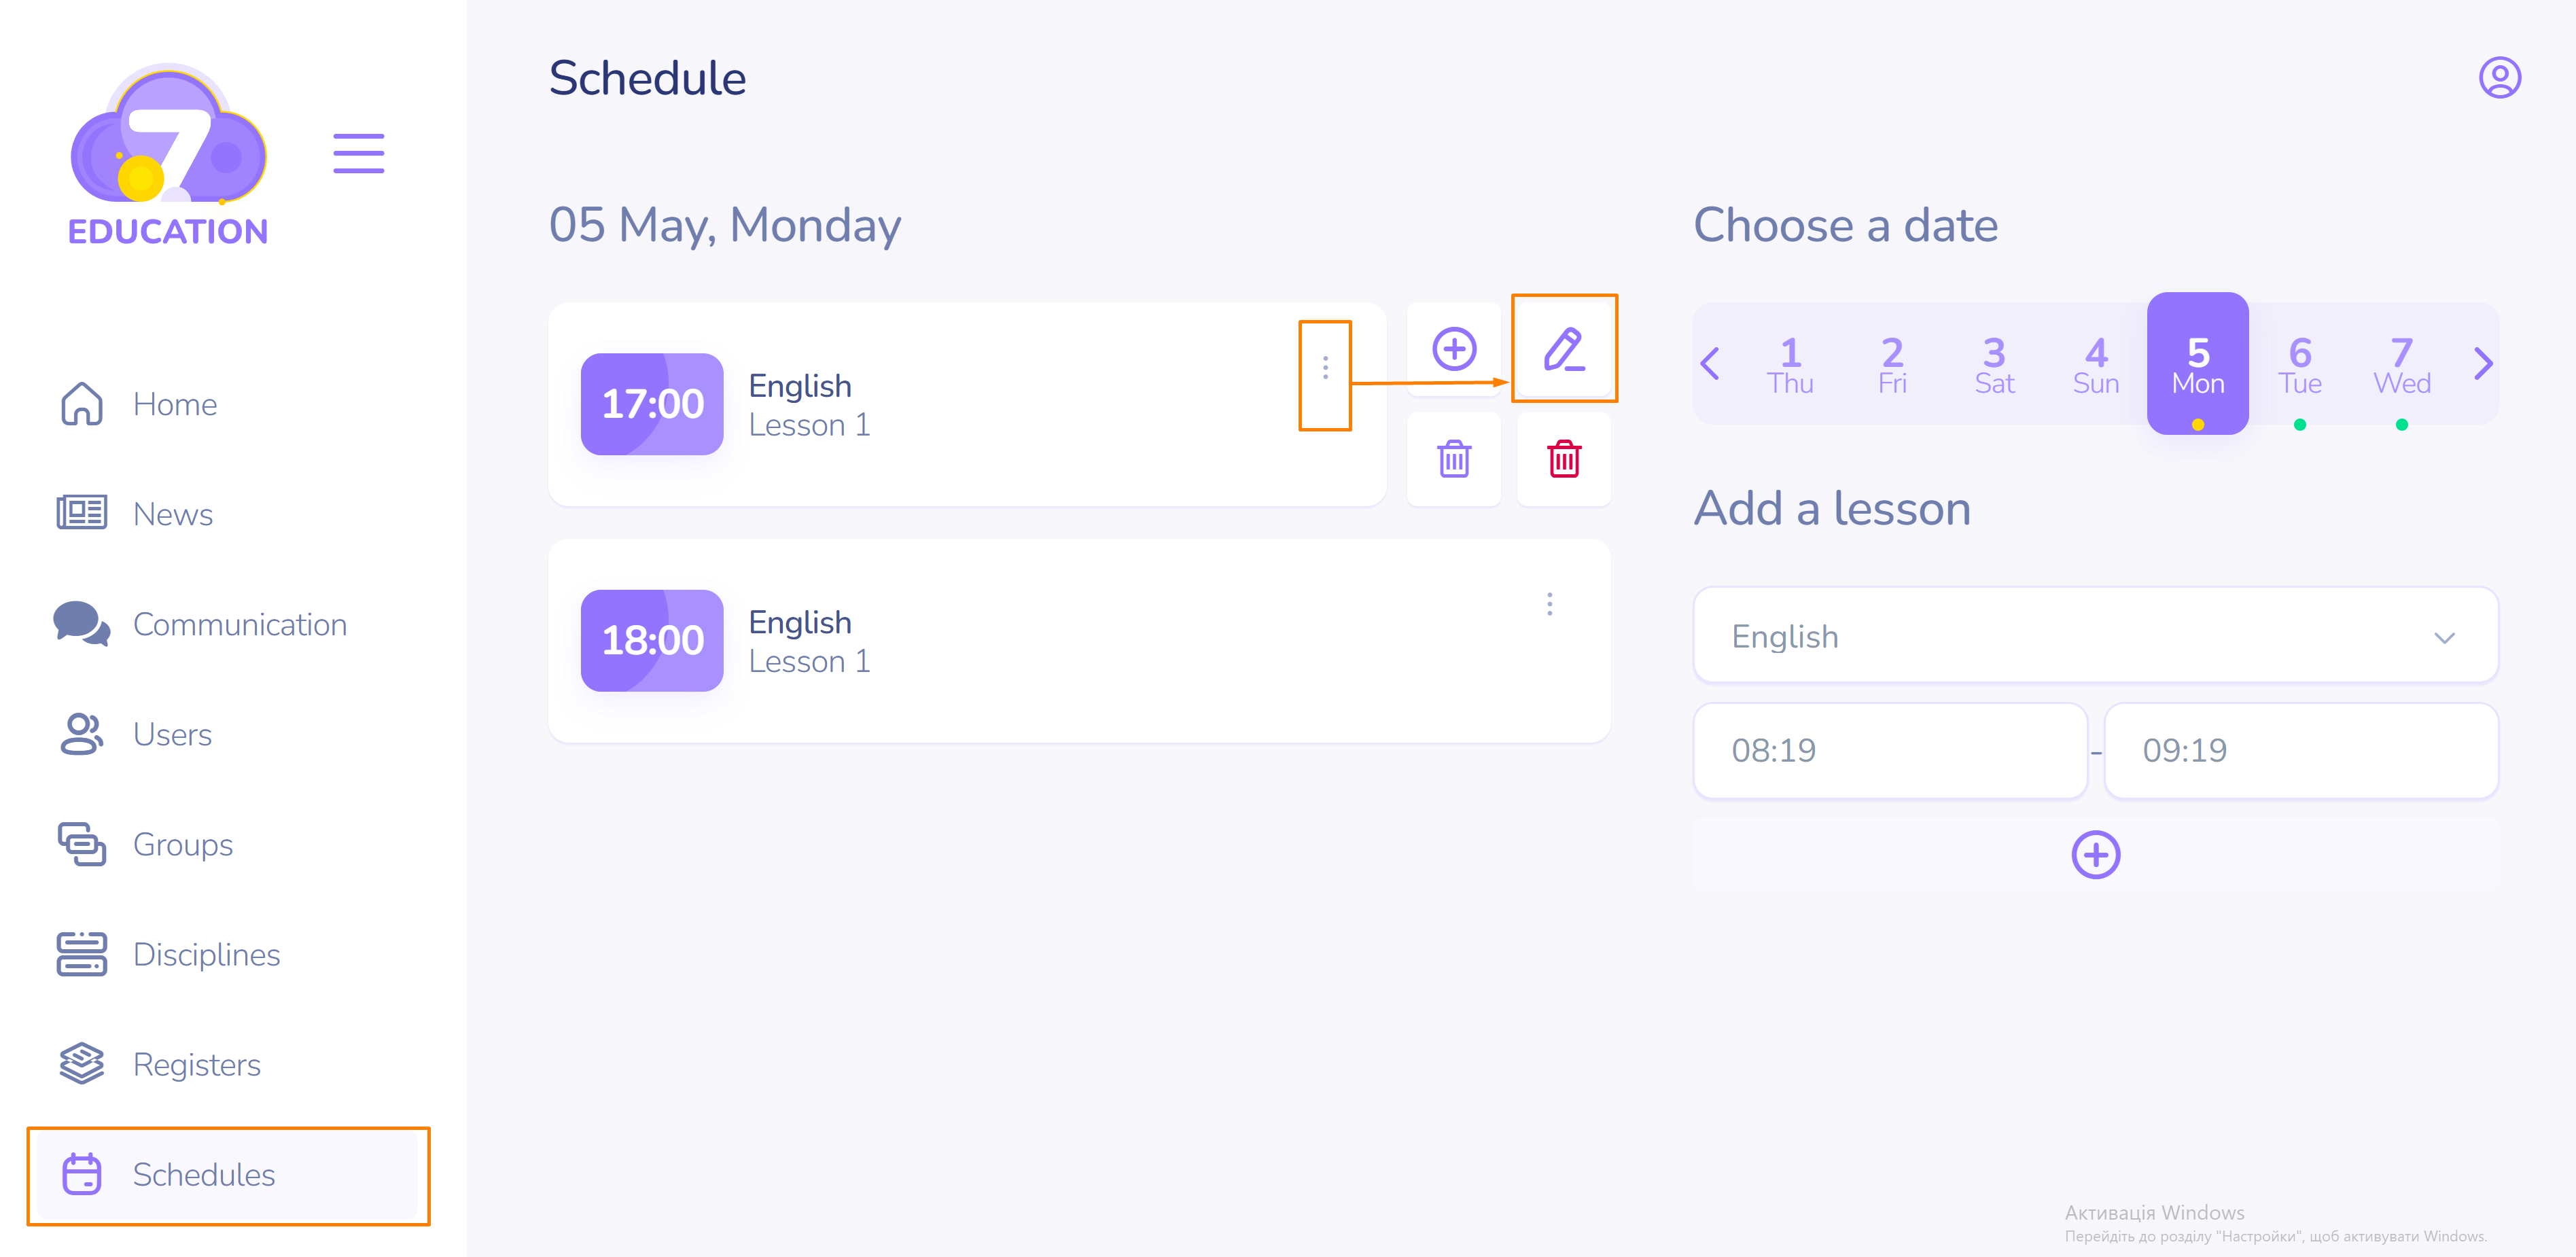
- Click the three dots on the right side of the lesson block.
- Click Edit to go to the lesson editing window.
The interface in the editing window is the same as when creating a lesson.
Lesson deletion
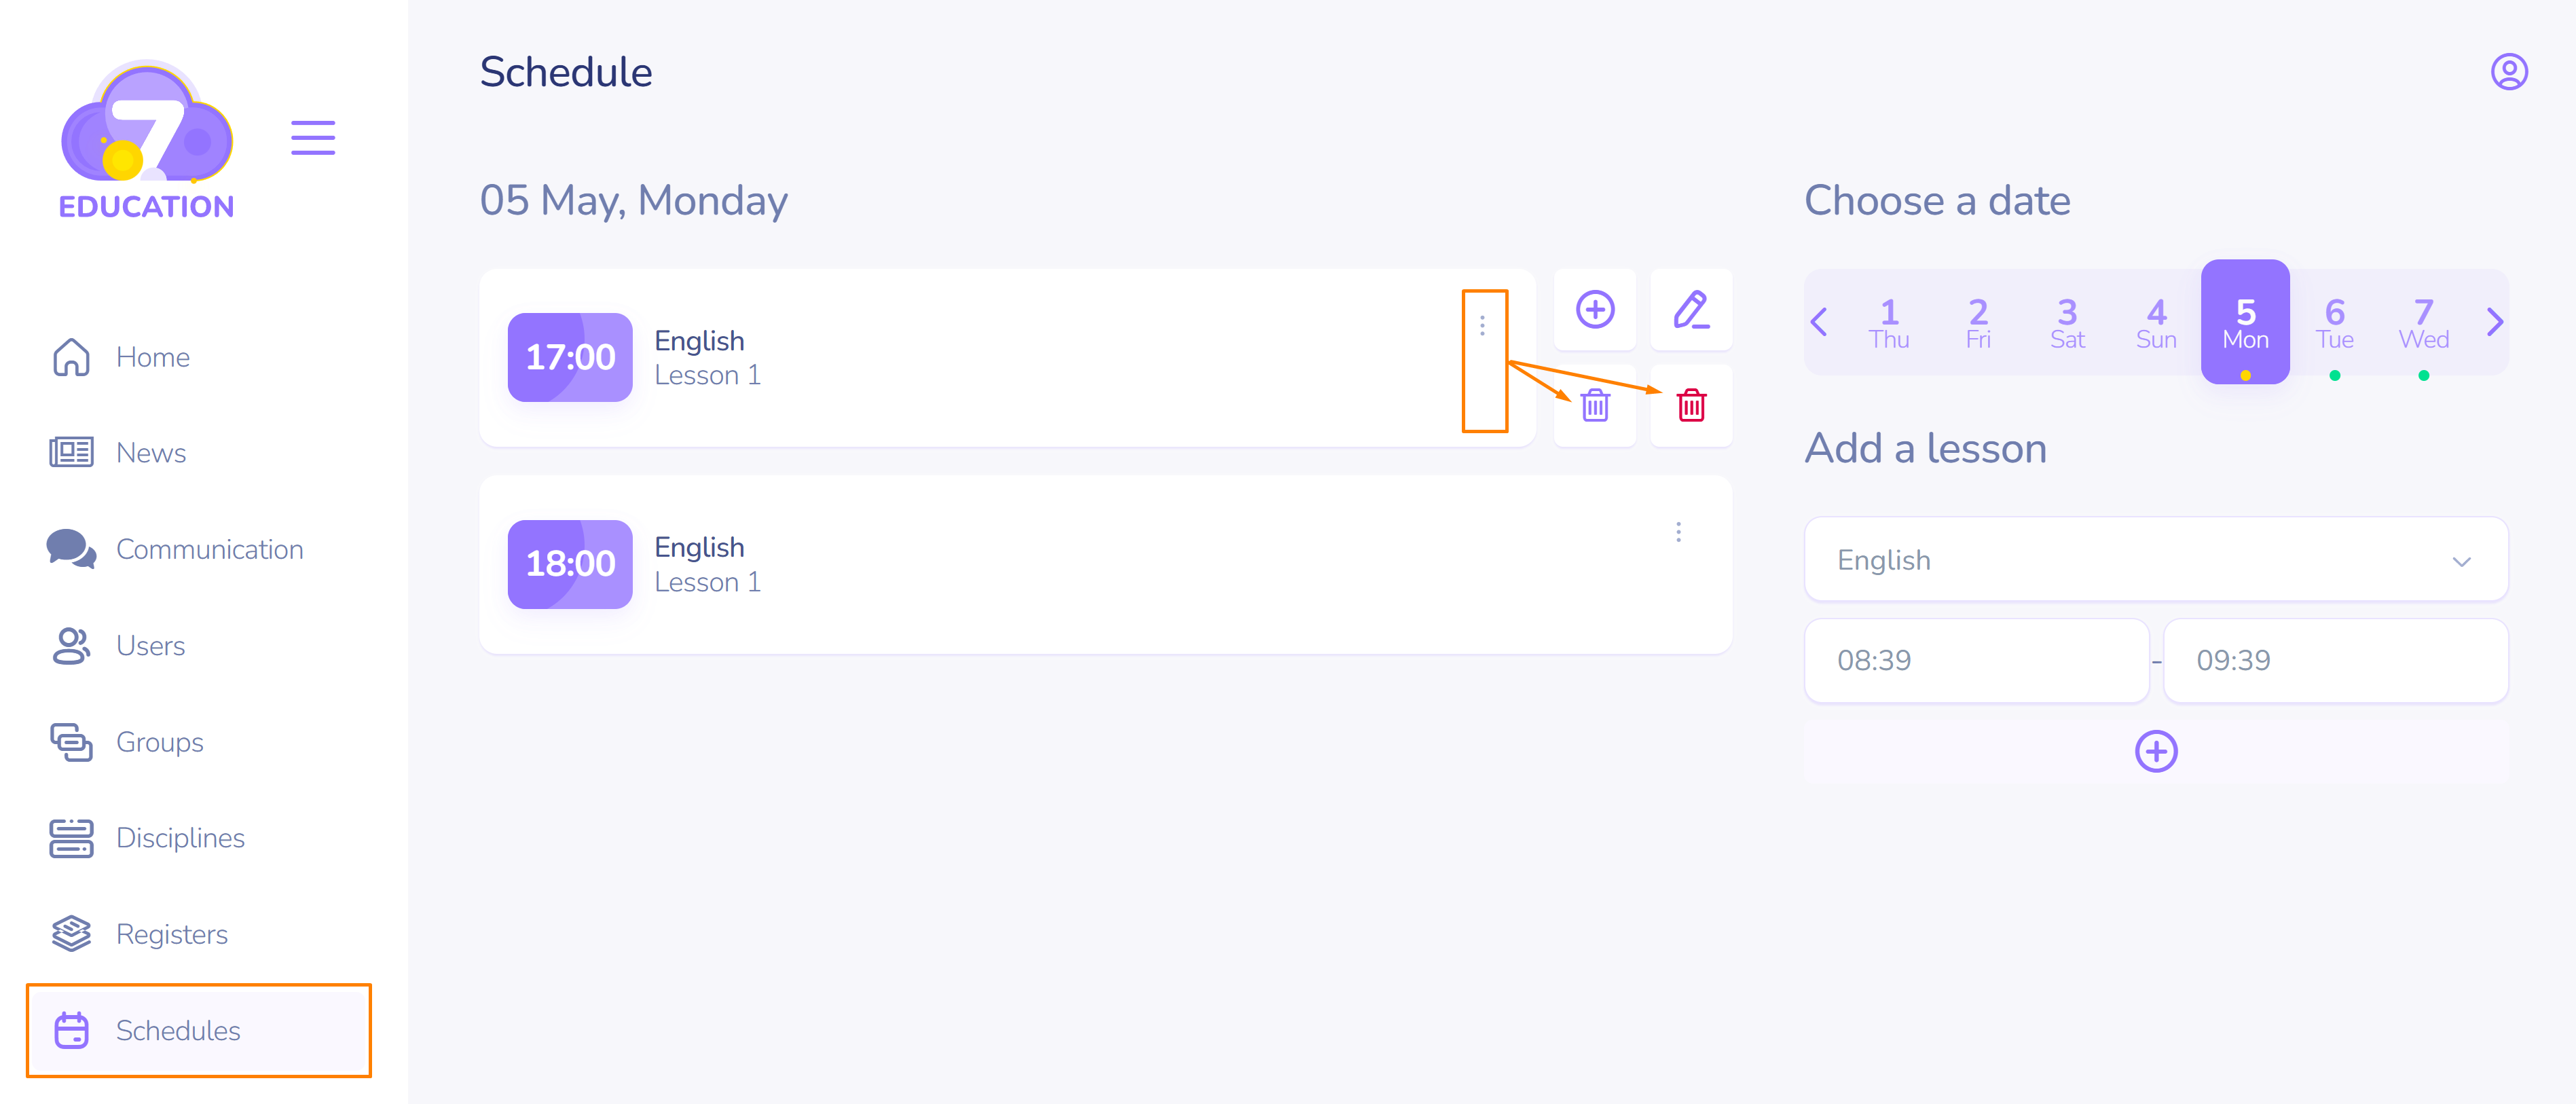
- Click the three dots on the desired block that contains the lesson.
- Select Delete.
Important! The left (purple in this case) bin button deletes content of a lesson. The right (red) bin button deletes a time slot for the lesson.